 |
|||
|
|
|||
|
Page Title:
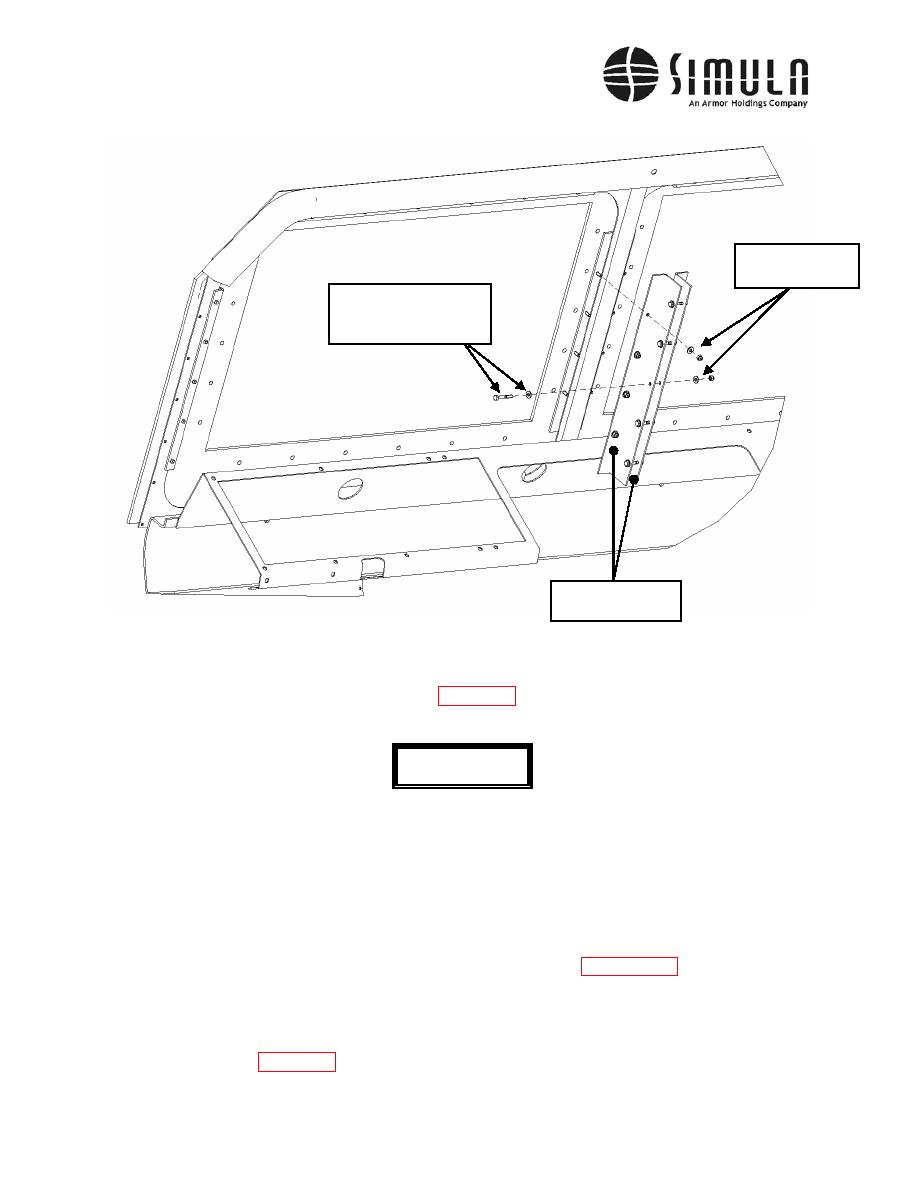
Figure 20. "L" Bracket Installation. |
|
||
| ||||||||||
|
|
 II113300-1-103
Rev. A
Nut 0.250-20,
Washers 0.250 ID
Bolt, Hex Head,
0.250-20 x 1.750 Long,
Washers 0.250 ID
"L" Brackets,
P/N 106746-1-103
m) Apply Urethane Sealant (P/N 104302-1) to the outside of the Windshield Frame
(P/N 106721-1-103), as shown in Figure 21. This will provide a seal around the
Windshield Armor (Glass) (P/N 113381-1) once it is installed.
WARNING
WARNING
FOR PROPER THREAT PROTECTION, THE TRANSPARENT WINDSHIELD
MUST BE CORRECTLY INSTALLED. ENSURE THAT THE STENCIL
MARKING "INSIDE OF VEHICLE" IS LOCATED SO THAT THE IDENTIFIED
SURFACE IS FACING THE INSIDE OF THE CAB. IMPROPERLY INSTALLED
WINDSHIELD ARMOR WILL NOT PERFORM AS INTENDED AND MAY
RESULT IN INJURY OR LOSS OF LIFE.
n) Loosely attach the two lower Windshield Retaining Brackets (P/N 113383-1-103)
using 0.250-in fasteners to the Windshield frame, see Figure 21. Set the Windshield
Armor (P/N 113381-1) on the Retaining Brackets and over the openings of the
Windshield Frame (P/N 106721-1). Complete the installation by securing the
Windshield Armor in place, using the remaining Windshield Retaining Brackets (P/Ns
113383-1-103 and 113383-3-103), and tightening all the 0.250-in. fasteners, as
shown in Figure 21.
0037 00-46
|
|
Privacy Statement - Press Release - Copyright Information. - Contact Us |
