 |
|||
|
|
|||
|
Page Title:
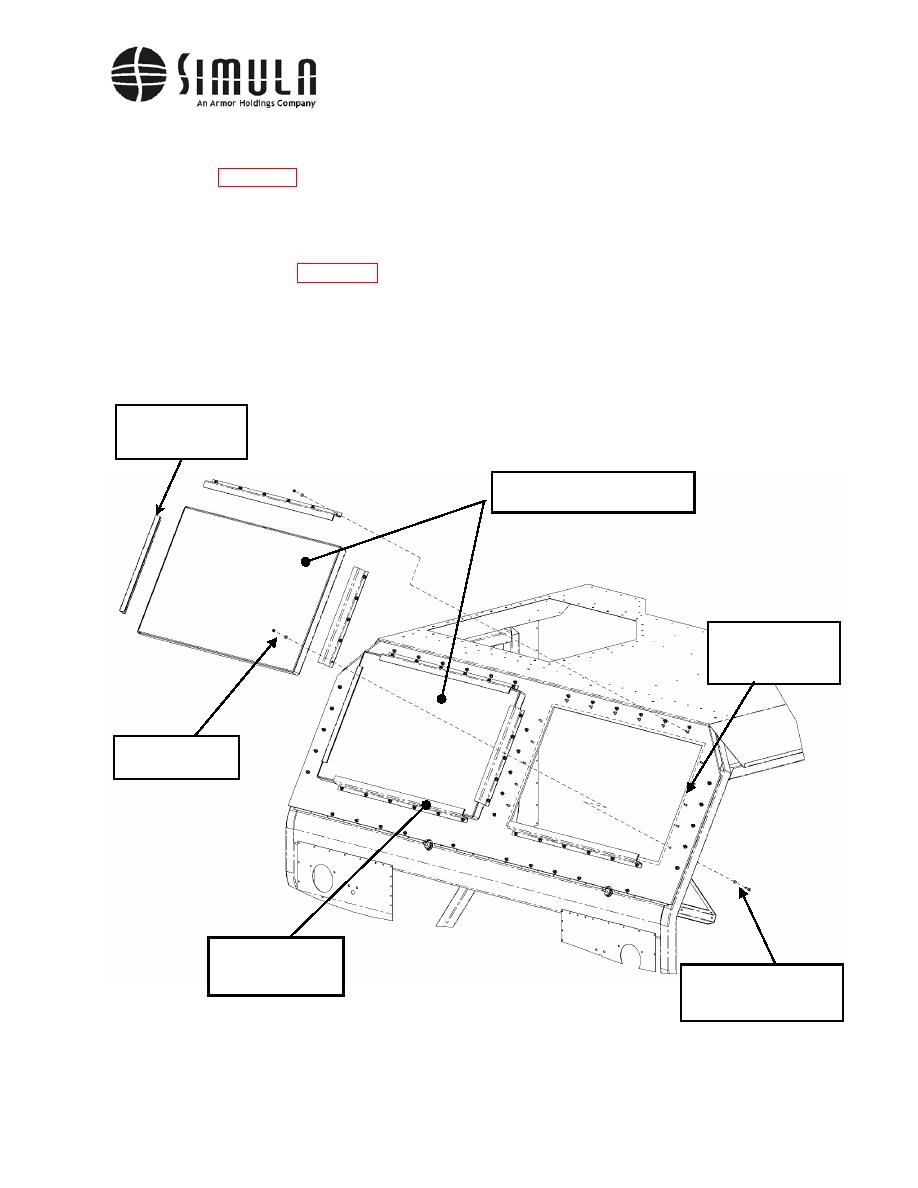
Figure 21. Armor Windshield installation. |
|
||
| ||||||||||
|
|
 II113300-1-103
Rev. A
o) If this is the first time the Windshield Armor has been installed on a vehicle, apply the
Cleaning Decal (P/N 104301-1) to the lower left hand corner of the Windshield Armor
(see Figure 22) so that it does not obstruct the driver's / passenger's view. Remove
the protective covers from the transparencies.
p) Install the Wiper Extension (P/N 111408-3) by threading the part fully onto the wiper
shaft and locking it in place using the set screw located on the side of the Wiper
Extension (see Figure 22). Re-attach the Windshield Wiper and Hardware that was
previously removed. Reconnect the wiper fluid hose to its nodule. Adjust the wiper
as necessary for correct arm travel.
q) It is recommended that leak check of the windshield be performed prior to returning
the vehicle to service.
Window Retaining
Brackets (Qty 4),
P/N 113383-3-103
Windshield Window Assembly,
P/N 113381-1
Urethane Sealant
around perimeter
(dashed line)
Nut 0.250-20,
Washer 0.250 ID
Window Retaining
Brackets (Qty 4),
Hex Head Bolts,
P/N 113383-1-103
0.250-20 x 1.000 Long,
Washers 0.250-In ID
Figure 21. Armor Windshield installation.
0037 00-47
|
|
Privacy Statement - Press Release - Copyright Information. - Contact Us |
