|
| |
TM 9-2320-364-20-4
12-77
(3)
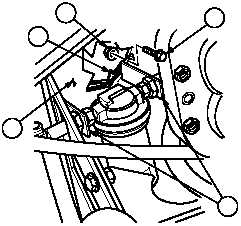
Remove two locknuts (10), two screws (11),
rear air dryer guard bracket (5) and hose
2259 cushion clip (12) from fuel/water
separator bracket (13) and air dryer bracket
(9). Discard locknuts.
b.
Installation.
(1)
Position hose 2259 cushion clip (12), rear air
dryer guard bracket (5) and fuel/water
separator bracket (13) on air dryer bracket
(9) with two screws (11) and locknuts (10).
(2)
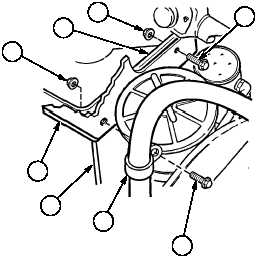
Position front air dryer guard bracket (4) and
two coalescing filter mounting bracket (8) on
air dryer bracket (9) with four screws (7) and
locknuts (6).
NOTE
Position air dryer guard screw
holes to aline with front and back
air dryer guard brackets.
(3)
Position air dryer guard (3) on front air dryer
guard bracket (4) and rear air dryer guard
bracket (5) with four screws (2) and locknuts
(1).
(4)
Tighten four locknuts (1), four locknuts (6)
and two locknuts (10).
c.
Follow-On Maintenance:
Install left front mud flap, (Para 17-36).
Remove wheel chocks, (TM 9-2320-364-10).
END OF TASK
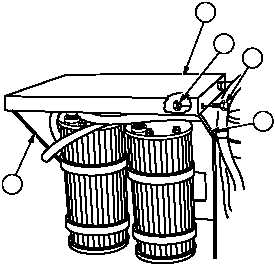
4
3
1
2
5
6
9
4
7
8
10
9
11
12
13
5
10
11
|