|
| |
TM 9-2320-364-20-4
6-29
(29)
Remove four screws (58), lockwashers (59)
and washers (60) from left side of radiator
assembly (35). Discard lockwashers.
(30)
Remove four screws (58), lockwashers (59)
and washers (60) from right side of radiator
assembly (35). Discard lockwashers.
(31)
With the aid of an assistant, remove air to oil
cooler assembly (61) and angle (62) from
radiator assembly (35).
NOTE
Baffles may stay with air to oil
cooler assembly or radiator
assembly.
(32)
Remove two baffles (63) from air to oil
cooler assembly (61) or radiator
assembly (35).
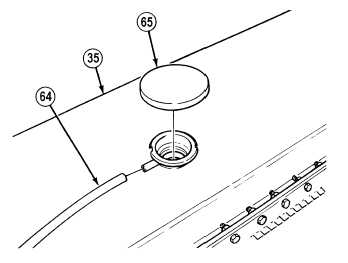
(33)
Remove overflow tube (64) from radiator
assembly (35).
(34)
Remove radiator cap (65) from radiator
assembly (35).
(35)
Remove radiator assembly (35) from
jackstands.
b.
Installation.
(1)
Position radiator assembly (35) on
jackstands.
(2)
Install radiator cap (65) on radiator
assembly (35).
(3)
Install overflow tube (64) on radiator
assembly (35).
|