|
| |
TM 9-2320-364-20-4
7-85
(3)
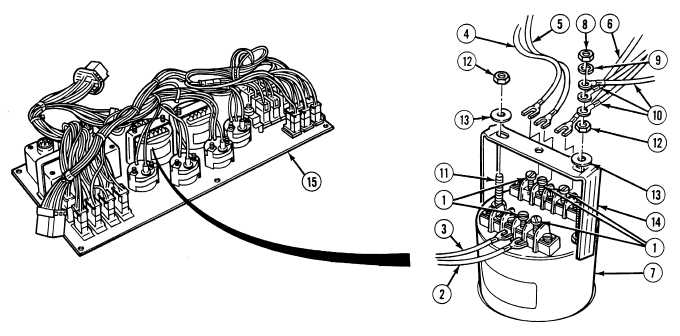
Remove two nuts (12) and washers (13) from two mounting bracket screws (11).
(4)
Remove mounting bracket (14) from rear of tachometer (7).
(5)
Remove tachometer (7) from instrument panel (15).
b.
Installation.
NOTE
Ensure face of gage is aligned properly with dash during installation.
If new instrument panel is being installed, ensure paint is cleaned off between tachometer
and speedometer on back of new instrument panel where mounting brackets contact panel
to allow for grounding.
(1)
Position tachometer (7) in instrument panel (15).
(2)
Install mounting bracket (14) on rear of tachometer (7).
(3)
Install two washers (13) and nuts (12) on two mounting bracket screws (11).
(4)
Install three ground wires (10), lockwasher (9) and nut (8) on mounting bracket screw (11).
(5)
Install wires 1052 (2), 1435 (3), 1435 (4), 1108 (5) and 1276 (6) on five screws (1).
c.
Follow-On Maintenance:
Install instrument panel, (Para 7-13).
Start engine, (TM 9-2320-364-10).
Check operation, (TM 9-2320-364-10).
Shut OFF engine, (TM 9-2320-364-10).
Remove wheel chocks, (TM 9-2320-364-10).
END OF TASK
|