|
| |
TM 9-2320-364-20-4
7-190
7-53. REAR MARKER LIGHT ASSEMBLY REPAIR (CONT).
b.
Disassembly.
Keep all moisture and oils off
lamp. Do not touch lamp with
bare hands. Use a clean dry, oil
free cloth to hold lamp while
installing lamp in blackout light.
NOTE
There are two blackout lights.
Both blackout lights are
removed the same way.
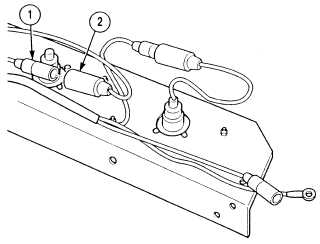
(1)
Disconnect wire 1680 (1) from wire 490 (2).
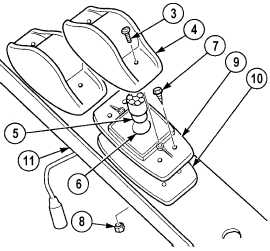
(2)
Remove two screws (3) from blackout lens
cover (4).
(3)
Remove blackout lamp (5) from blackout
lamp socket (6).
(4)
Remove two self-tapping screws (7), nut
(8), blackout light assembly (9) and gasket
(10) from rear light bar assembly (11).
Discard self-tapping screws.
c.
Cleaning/Inspection.
(1)
Inspect all wires and connectors for damage.
(2)
Inspect bulbs, LEDs and lens for cracks.
(3)
Inspect all other parts for cracks or other
damage.
(4)
Replace all damaged parts. If entire marker
light assembly is being replaced, new
marker light assembly will be a LED.
|