|
| |
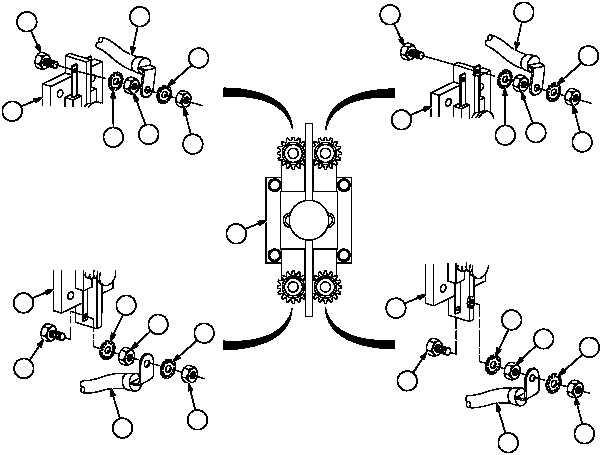
TM 9-2320-364-20-4
7-379
(7)
Install screw (8), lockwasher (7), nut (6), wire 1274 (12), lockwasher (4) and nut (3) on lower left section
of battery disconnect switch (9).
(8)
Install screw (8), lockwasher (7), nut (6), wire 1271A (11), lockwasher (4) and nut (3) on lower right
section of battery disconnect switch (9).
(9)
Install screw (8), lockwasher (7), nut (6), wire 1566 (10), lockwasher (4) and nut (3) on upper left section
of battery disconnect switch (9).
(10)
Install screw (8), lockwasher (7), nut (6), wire 1271A (5), lockwasher (4) and nut (3) on upper right
section of battery disconnect switch (9).
(11)
Tighten nuts (3) to 15 lb-ft (20 N.m).
Adhesives, solvents and sealing compounds can burn easily, can give off harmful vapors,
and are harmful to skin. To avoid injury or death, keep away from open fire and use in well
ventilated area. If adhesives, solvent or sealing compound gets on skin or clothing, wash
immediately with soap and water.
(12)
Apply electrical sealant to ends of four screws (8).
3
4
5
6
7
8
9
3
4
10
6
7
8
9
8
9
8
9
7
6
7
6
3
3
4
4
11
12
9
|