|
| |
TM 9-2320-364-20-5
21-47
(12)
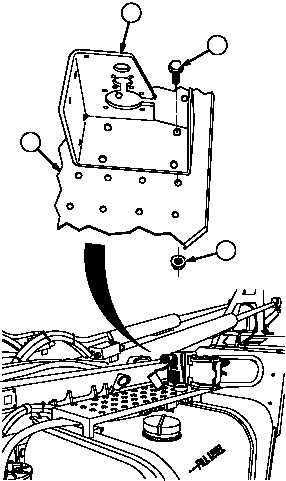
Remove four locknuts (25), screws (26) and
interface mounting bracket (7) from step
(27). Discard locknuts.
b.
Installation.
NOTE
Use existing holes in step to
mount interface mounting
bracket. Rear inside screw should
be located in first hole from the
rear and first row from inside.
(1)
Install interface mounting bracket (7) to step
(27) with four screws (26) and locknuts (25).
(2)
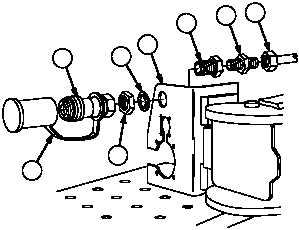
Install fitting (22) in interface mounting
bracket (7) with lockwasher (24) and jam nut
(23).
Adhesives, solvents, and sealing
compounds can burn easily, can
give off harmful vapors, and are
harmful to skin and clothing. To
avoid injury or death, keep away
from open fire and use in a
well-ventilated area. If adhesive,
solvent, or sealing compound gets
on skin or clothing, wash
immediately with soap and water.
(3)
Apply sealing compound on threads of
fitting (22).
(4)
Install quick disconnect (19) on fitting (22).
(5)
Apply sealing compound on threads of
fitting (21).
(6)
Install fitting (21) in fitting (22).
(7)
Install air line 2133 (20) on fitting (21).
(8)
Install cover (18) on air quick disconnect
(19).
25
27
26
7
20
21
22
7
24
19
23
18
|