|
| |
TM 9-2320-364-34-2
3-138
3-22. ENGINE OIL PAN AND GASKET REPLACEMENT (CONT).
Adhesives, solvents, and sealing compounds can burn easily, can give off harmful vapors, and
are harmful to skin and clothing. To avoid injury or death, keep away from open fire and use
in well-ventilated area. If adhesive, solvent, or sealing compound gets on skin or clothing,
wash immediately with soap and water.
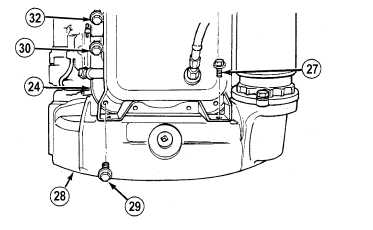
(14) Apply sealing compound to four screws (29).
(15) Position four screws (29) in rear of oil
pan (24).
(16) Apply sealing compound to two screws (27).
(17) Position two screws (27) in flywheel
housing (28).
NOTE
Oil pan screws are tightened
starting with center screw on
each side and working
alternately toward each end of
oil pan.
(18) Tighten screws (32), (30) and (27) in oil
pan (24) to 120 to 240 lb-in (14 to 27 N.m).
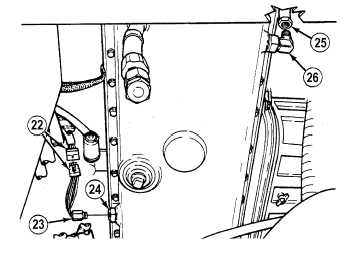
(19)
Apply sealing compound to threads of
elbow (26).
(20)
Install elbow (26) in oil pan (24).
(21)
Install hose 2630 (25) on elbow (26).
(22)
Apply sealing compound to threads of
sensor (23).
(23)
Install sensor (23) in oil pan (24) and
connect sensor connector (22).
|