|
| |
TM 9-2320-364-34-2
6-97
b.
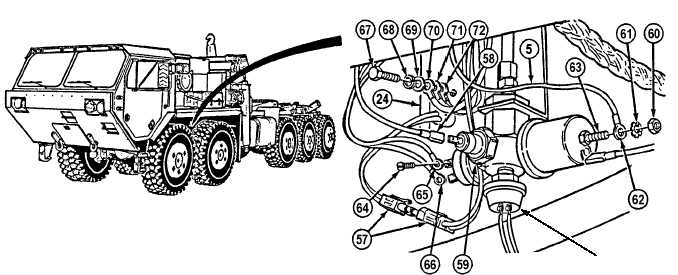
Installation.
NOTE
Evenly distribute any slack in harness.
Install cable ties as required.
(1)
Position engine wire harness (5) through truck.
(2)
Install shield wires (72) and (71), wire 1435 (70), washer (69), lockwasher (68) and screw (67) on
engine (24).
(3)
Install wires 1871 (65) and 1517 (66) and two screws (64) on engine oil switch (59).
(4)
Install wire 1113 (62), lockwasher (61) and nut (60) on engine oil sending unit stud (63).
Adhesives, solvents, and sealing compounds can burn easily can give off harmful vapors, and
are harmful to skin and clothing. To avoid injury or death, keep away from open fire and use in a
well-ventilated area. If adhesive, solvent, or sealing compound gets on skin or clothing, wash
immediately with soap and water.
(5)
Coat stud (63), two screws (64), and screw (67) with electrical sealant.
(6)
Install wire 1032 (58) on engine oil switch (59).
(7)
Connect MC56 connector (57).
(200 AMP
ALTERNATOR
ONLY)
|