 |
|||
|
|
|||
|
|
|||
| ||||||||||
|
|
 TM 9-2330-385-14
(4)
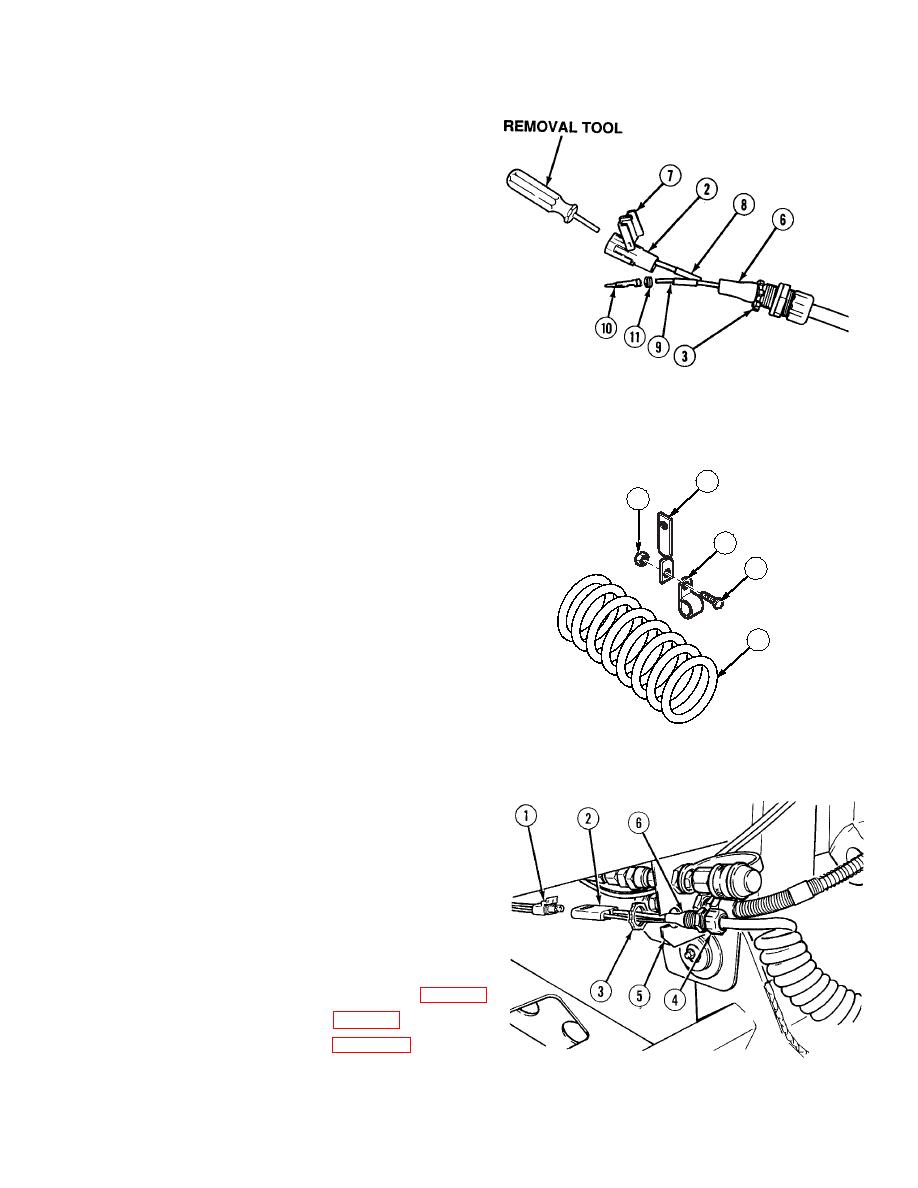
Open latch (7) on connector (2).
(5)
Insert and push removal tool in connector (2)
and remove wire (8).
(6)
Insert and push removal tool in connector (2)
and remove wire (9).
(7)
Remove contacts (10) and boots (11) from
wires (8) and (9).
(8)
Remove locknut (3) from wire assembly (6).
Discard locknut.
(9)
Remove locknut (12), screw (13) and twist
bracket (14) from clamp (15). Discard locknut.
(10) Remove clamp (15) from wire assembly (6).
b.
Installation.
NOTE
14
Clamp is properly installed when
12
positioned on the fourteenth coil from
the trailer end of the wire assembly.
15
(1)
Install clamp (15) on wire assembly (6).
13
(2)
Install twist bracket (14) on clamp (15) using
screw (13) and locknut (12).
(3)
Install contacts (10) and boots (11) to wire (8)
6
and (9).
(4)
Install locknut (3) over wires (8) and (9).
(5)
Install wires (8) and (9) on connector (2).
(6)
Close latch (7) on connector (2).
(7)
Install wire assembly (6) on bracket (5).
(8)
Tighten locknut (3) on connector (4) and
bracket (5).
NOTE
Ensure male and female ends of
connectors are securely latched
together.
(9)
Connect connector (2) on connector (1).
c.
Follow-On Maintenance:
Install intervehicular cable on truck, (Para 2-9).
Install load lock cable, (Para 2-9).
Remove wheel chocks, (Para 2-20).
END OF TASK
4-405
|
|
Privacy Statement - Press Release - Copyright Information. - Contact Us |
