 |
|||
|
|
|||
|
|
|||
| ||||||||||
|
|
 TB 9-2320-279-13&P-2
FRONT SIDE ARMOR ASSEMBLY REPLACEMENT - CONTINUED
0031 00
DISASSEMBLY
1.
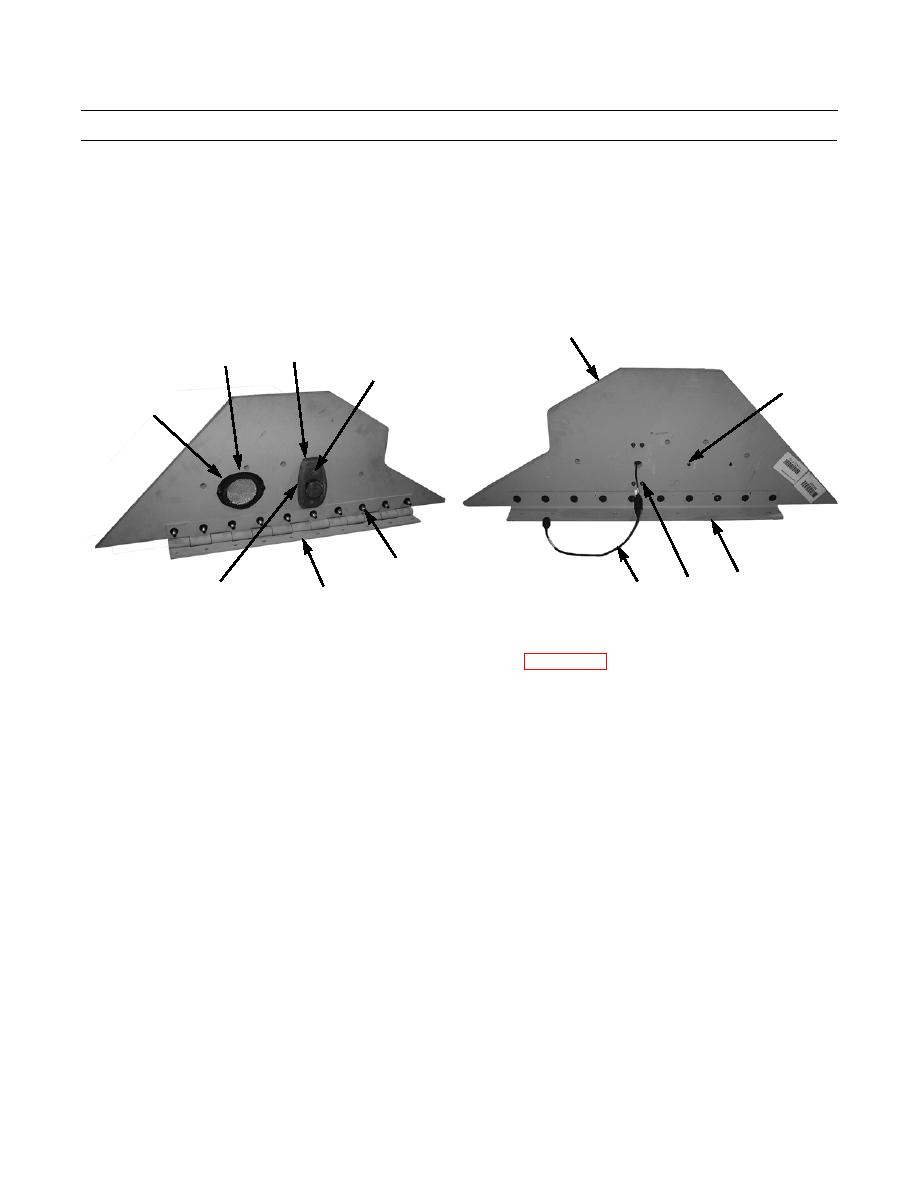
Remove two screws (6), washers (7), nuts (11), washers (12), and reflector (8) from side armor (5).
2.
Remove two screws (10) and side marker cover (9) from side armor (5).
3.
Remove four bolts (14), locknuts (15), and side marker (20) from side armor (5). Discard locknuts.
4.
Remove 10 bolts (16), washers (17), and locknuts (18) from side armor (5). Discard locknuts.
5.
Remove bracket (13) and hinge (19) from side armor (5).
5
9
8
10
11,12
6,7
16,17,18
13
14,15
20 (HIDDEN)
4
19
417-040
CLEANING AND INSPECTION
ASSEMBLY
1.
Install bracket (13) and hinge (19) on side armor (5).
2.
Install 10 bolts (16), washers (17) and new locknuts (18) on side armor (5).
3.
Install side marker (20), four bolts, (14) and new locknuts (15).
4.
Install side marker cover (9) and two screws (10) on side marker (20).
5.
Install reflector (8), two washers (12), nuts (11), washers (7) and screws (6).
0031 00-3
|
|
Privacy Statement - Press Release - Copyright Information. - Contact Us |
