|
| |
TM 9-2320-364-34-2
6-68
6-9. HOIST PROXIMITY SENSOR REPLACEMENT/ADJUSTMENT (CONT).
c.
Adjustment.
(1)
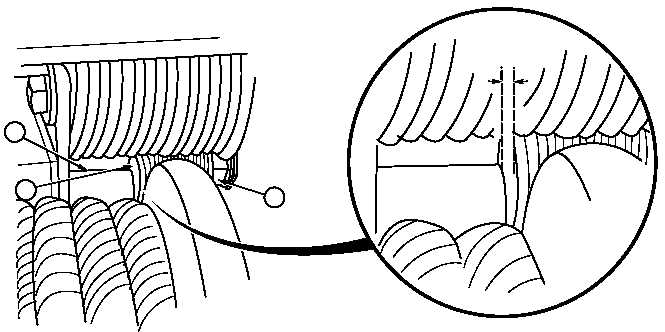
Loosen nuts (1) and move hoist proximity sensor (2) in or out until sensor is 1/8 to 3/16 in. (3.2 to 4.8
mm) from edge of cable tensioner roller (3).
(2)
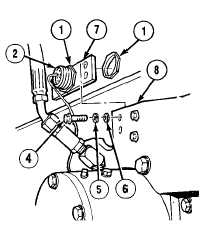
Remove two screws (4), lockwashers (5), washers (6), hoist proximity sensor (2) and bracket (7) from
cable guide bracket (8).
Do not overtighten nuts or damage to equipment will result. Tighten nuts just enough to
lock sensor in place.
(3)
Tighten nuts (1) on hoist proximity sensor (2).
Adhesives, solvents, and sealing
compounds can burn easily, can
give off harmful vapors, and are
harmful to skin and clothing. To
avoid injury or death, keep away
from open fire and use in well-
ventilated area. If adhesive,
solvent, or sealing compound
gets on skin or clothing, wash
immediately with soap and water.
(4)
Coat threads of two screws (4) with sealing
compound.
(5)
Install hoist proximity sensor (2) and
bracket (7) on cable guide bracket (8) with
two washers (6), lockwashers (5) and
screws (4).
1
3
2
1/8 IN. (3.2 MM)
TO
3/16 IN. (4.8 MM)
|