|
| |
TM 9-2320-364-34-3
14-57
c.
Axle No. 3 Longitudinal Torque Rod Replacement.
(1)
Removal.
(a)
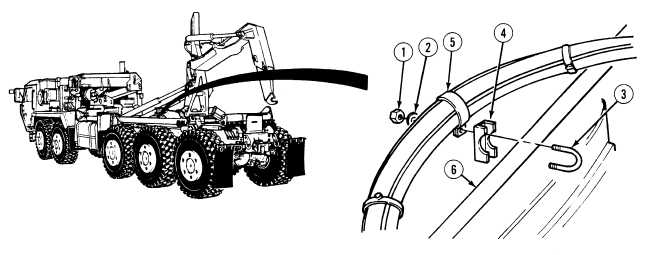
Remove two nuts (1), lockwashers (2), U-bolt (3), clamp half (4) and cushion clip (5) from torque
rod (6). Discard lockwashers.
(b)
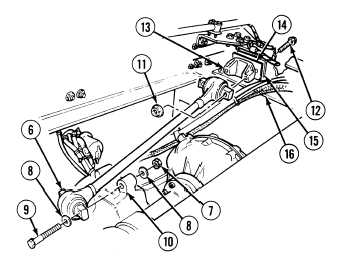
With the aid of an assistant, remove
two locknuts (7), four washers (8) and
two screws (9) from axle (10). Discard
locknuts.
NOTE
Tag and note number and
size of spacers during
removal.
(c)
With the aid of an assistant, remove
two locknuts (11), screws (12), torque
rod (6), bracket (13), spacers (14) and
plate (15) from crossmember (16).
Discard locknuts.
(2)
Installation.
(a)
With the aid of an assistant, position axle end of torque rod (6) on axle (10) with two screws (9),
four washers (8) and two locknuts (7).
NOTE
Install same number and size of spacers as noted during removal.
(b)
With the aid of an assistant, install plate (15), spacers (14), bracket (13) and torque rod (6) on
crossmember (16) with two screws (12) and locknuts (11).
(c)
Tighten locknuts (7) on screws (9).
|