 |
|||
|
|
|||
|
|
|||
| ||||||||||
|
|
 TM 9-3990-206-14&P
NOTE
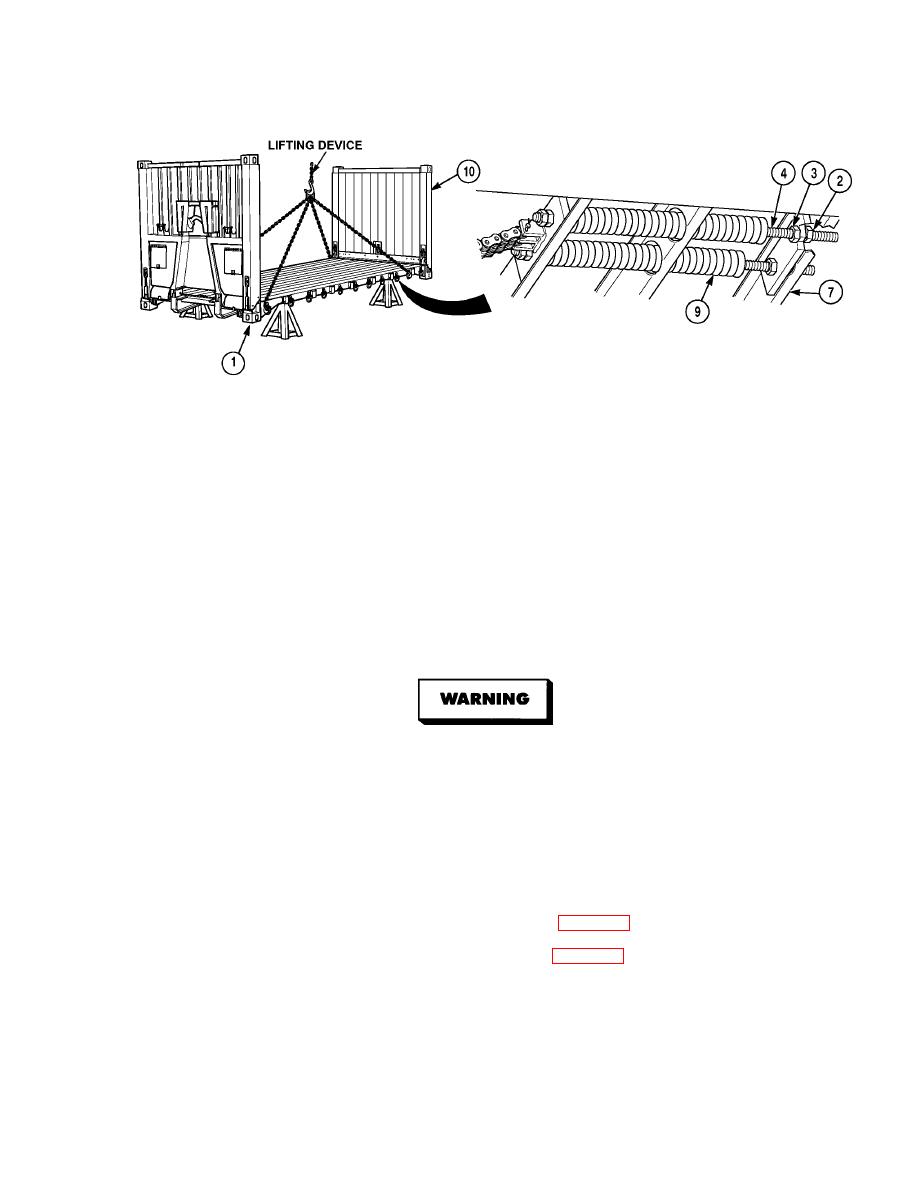
Perform Steps (17) through (33) for rear wall spring adjustment.
(17)
Loosen four jam nuts (3) on threaded rods (4) until jam nuts are against springs (9).
(18)
Loosen, but do not remove, four nuts (2) on threaded rods (4).
(19)
Slide springs (9) toward center of flatrack (1).
(20)
Tighten four nuts (2) until nuts contact removable crossmember (7).
NOTE
Nut may be marked to ensure a complete revolution.
(21)
Tighten four nuts (2), an additional five complete turns.
Adhesives, solvents and sealing compounds can burn easily, can give off harmful vapors
and are harmful to skin and clothing. To avoid injury or death, keep away from open fire
and use in well-ventilated area. If adhesive, solvent or sealing compound gets on skin or
clothing, wash immediately with soap and water.
(22)
Apply sealing compound to threads of four threaded rods (4) on spring side of removable crossmember (7).
(23)
Tighten jam nuts (3) on threaded rods (4) until jam nuts contact removable crossmember (7).
Tighten four nuts (2) on threaded rods (4) to 200 lb-ft (271 N.m).
(24)
(25)
With the aid of an assistant, lower rear wall (10). Refer to Para 7-10.
(26)
With the aid of an assistant, raise rear wall (10). Refer to Para 7-10.
9-41
|
|
Privacy Statement - Press Release - Copyright Information. - Contact Us |
