|
| |
TM 9-2320-364-20-5
20-54
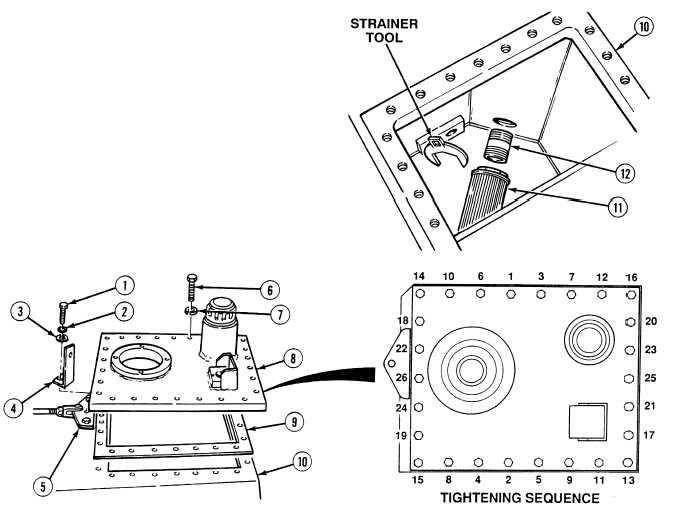
20-13. HYDRAULIC RESERVOIR STRAINER REPLACEMENT (CONT).
(4)
Using strainer tool, remove strainer (11) and
nipple (12) from hydraulic reservoir (10).
(5)
Remove nipple (12) from strainer (11).
b.
Installation.
(1)
Install nipple (12) on strainer (11).
(2)
Using strainer tool, install nipple (12) and
strainer (11) in hydraulic reservoir (10).
(3)
Position gasket (9) and lid (8) on hydraulic reservoir (10).
(4)
Install lid (8) with 26 lockwashers (7) and screws (6). Tighten screws to 45 to 65 lb-in (5-7 N.m) using
torque sequence as shown. Repeat torque sequence and torque to 60 to 65 lb-in (7 N.m).
NOTE
Install bracket in position as noted prior to removal.
(5)
Install bracket (4), washer (3), lockwasher (2) and screw (1) on reservoir bracket (5). Tighten screw to 45
to 65 lb-in (5-7 N.m).
|