 |
|||
|
|
|||
|
|
|||
| ||||||||||
|
|
 TM 9-2330-385-14
(4)
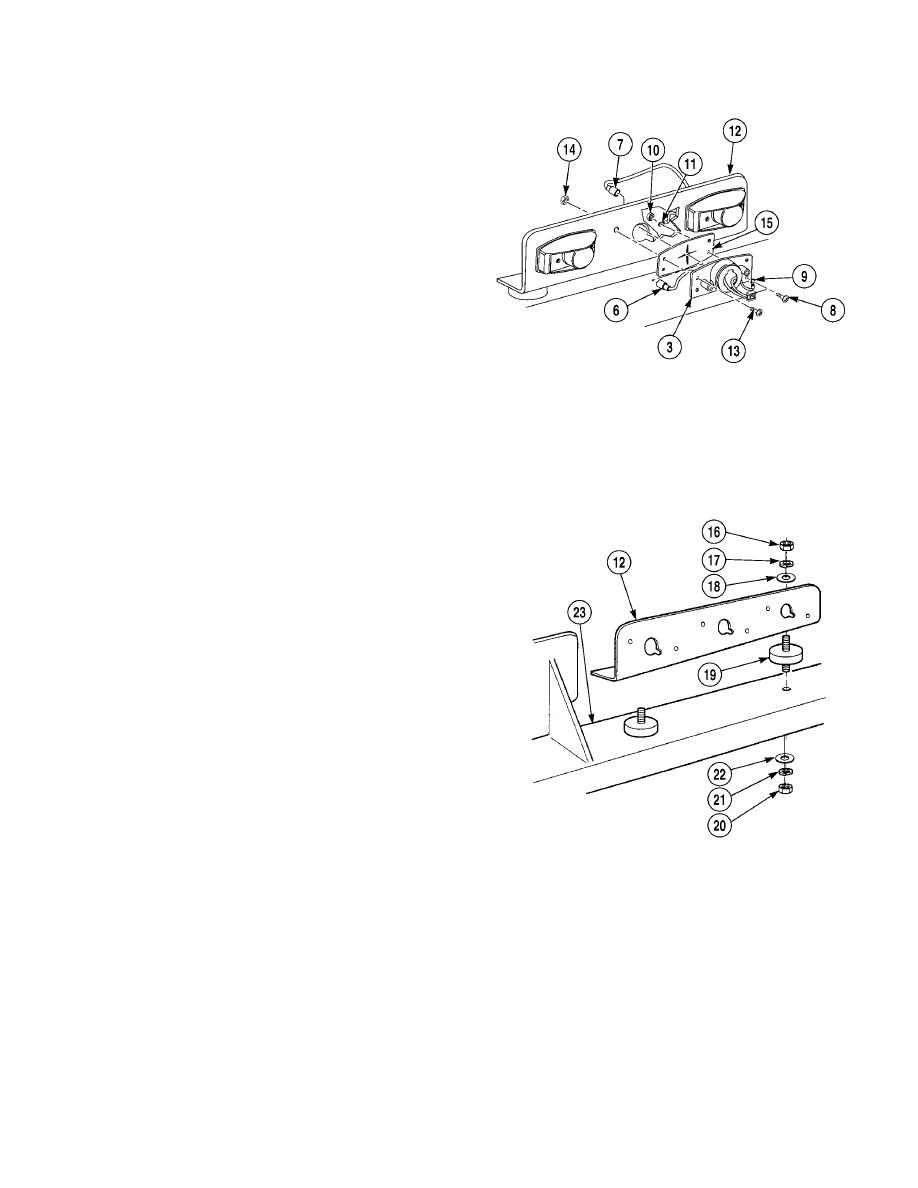
Disconnect 489 connector (6) from 1012B
connector (7).
NOTE
Ground wire 1435 (11) only
removed from center light.
(5)
Remove screw (8), pigtail ground (9),
locknut (10), and wire 1435 (11) from
mounting base (3) and bracket (12).
Discard locknut.
(6)
Remove screw (13), locknut (14), mounting
base (3), and gasket (15) from bracket (12).
(7)
Remove two nuts (16), lockwashers (17),
and washers (18) from bracket (12) and
mounts (19). Discard lockwashers.
(8)
Remove bracket (12) from mounts (19).
(9)
Remove two nuts (20), lockwashers (21),
washers (22), and mounts (19) from frame
(23). Discard lockwashers.
b.
Installation.
NOTE
If only replacing LED,
perform steps (7) through
(9).
To properly secure bracket,
it may be necessary to
tighten upper and lower nuts
at the same time.
All three lights are installed
the same way.
Replace cable ties as required.
(1)
Install two mounts (19) on frame (23) with two washers (22), lockwashers (21), and nuts (20).
(2)
Position bracket (12) on two mounts (19).
(3)
Install two washers (18), lockwashers (17), and nuts (16) on mounts (19).
4-346.3
4-3
|
|
Privacy Statement - Press Release - Copyright Information. - Contact Us |
