 |
|||
|
|
|||
|
|
|||
| ||||||||||
|
|
 TM 9-3990-206-14&P
This task covers:
a. Removal
b. Installation
INITIAL SETUP
Tools and Special Tools
Materials/Parts
Tool Kit, General Mechanic's: Automotive
Sealing Compound (Item 12, Appendix E)
(Item 15, Appendix I)
Locknut (Item 13, Appendix H)
a.
Removal.
1
4
2
3
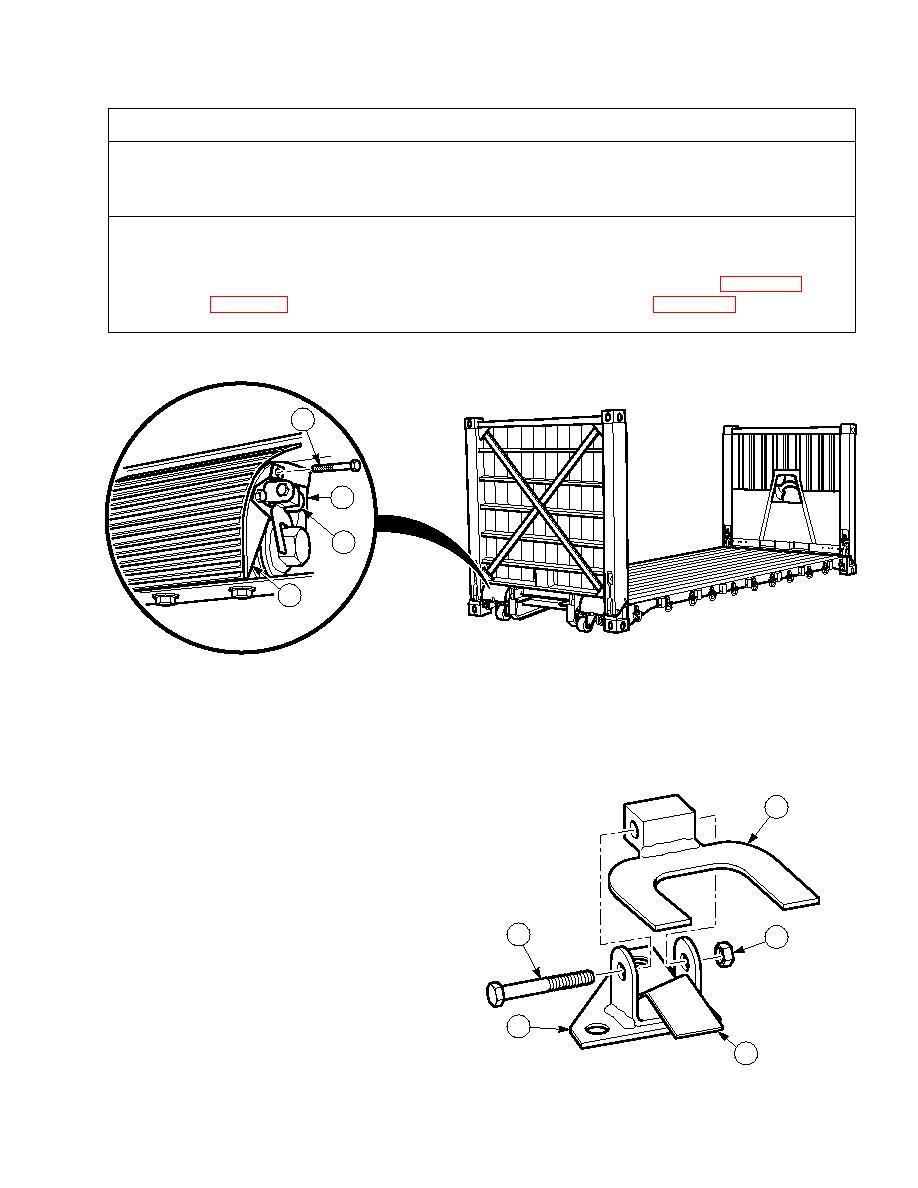
NOTE
Mud flap plate is found on rear wall only.
All four pin lock assemblies are removed the same way. Rear pin lock assembly shown.
(1)
Remove two screws (1), pin lock bracket (2) and mud flap plate (3) from bracket assembly (4).
(2)
Remove pin lock spring (5) from pin lock
8
bracket (2).
(3)
Remove locknut (6), screw (7) and pin lock
flipper (8) from pin lock bracket (2).
Discard locknut.
b.
Installation.
7
6
(1)
Install pin lock flipper (8) on pin lock
bracket (2) with screw (7) and locknut (6).
Tighten until two full threads of screw are
visible past locknut.
2
(2)
Position pin lock spring (5) in pin lock
5
bracket (2).
|
|
Privacy Statement - Press Release - Copyright Information. - Contact Us |
