 |
|||
|
|
|||
|
Page Title:
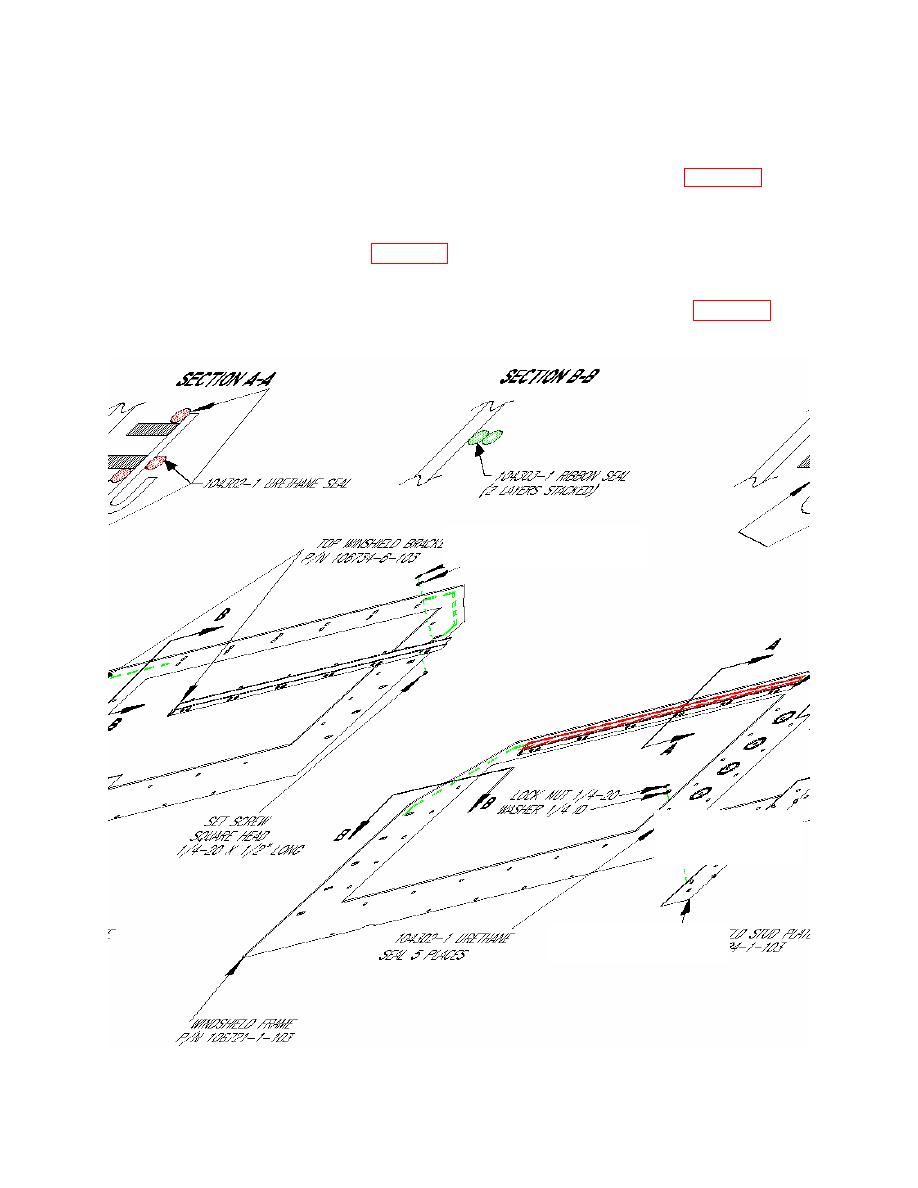
Figure 17. Windshield Frame pre-assembly. |
|
||
| ||||||||||
|
|
 II106700-5
Rev. B
Page 34
e) Attach the Top Windshield Brackets (P/N 106734-2 or -6-103) marked "This Side
Out" to the opposite side of the Windshield Frame (P/N 106721-1-103) on the upper
studs using twelve (12) 0.250-in. self-locking nuts and washers (see Figure 17).
Verify that both brackets are parallel with the top edge of the windshield frame.
f)
Apply sealant (P/N 104302-1) to the windshield frame around the windshield stud
plate mounting holes per Figure 17.
g) Attach the Windshield Stud Plate, (P/N 106733-1-103) to the Windshield Frame
using five (5) 0.250-in. self-locking screws and washers, as shown in Figure 18.
Torque the nuts to 6 ft-lb.
TOP WINDSHIELD BRACKETS,
P/N 106734-2 OR -6-103
BOLT, HEX
1/4 20 X 3/4 LONG
WINDSHIELD STUD PLATE,
P/N 106733-1-103
0039 00-44
|
|
Privacy Statement - Press Release - Copyright Information. - Contact Us |
