 |
|||
|
|
|||
|
Page Title:
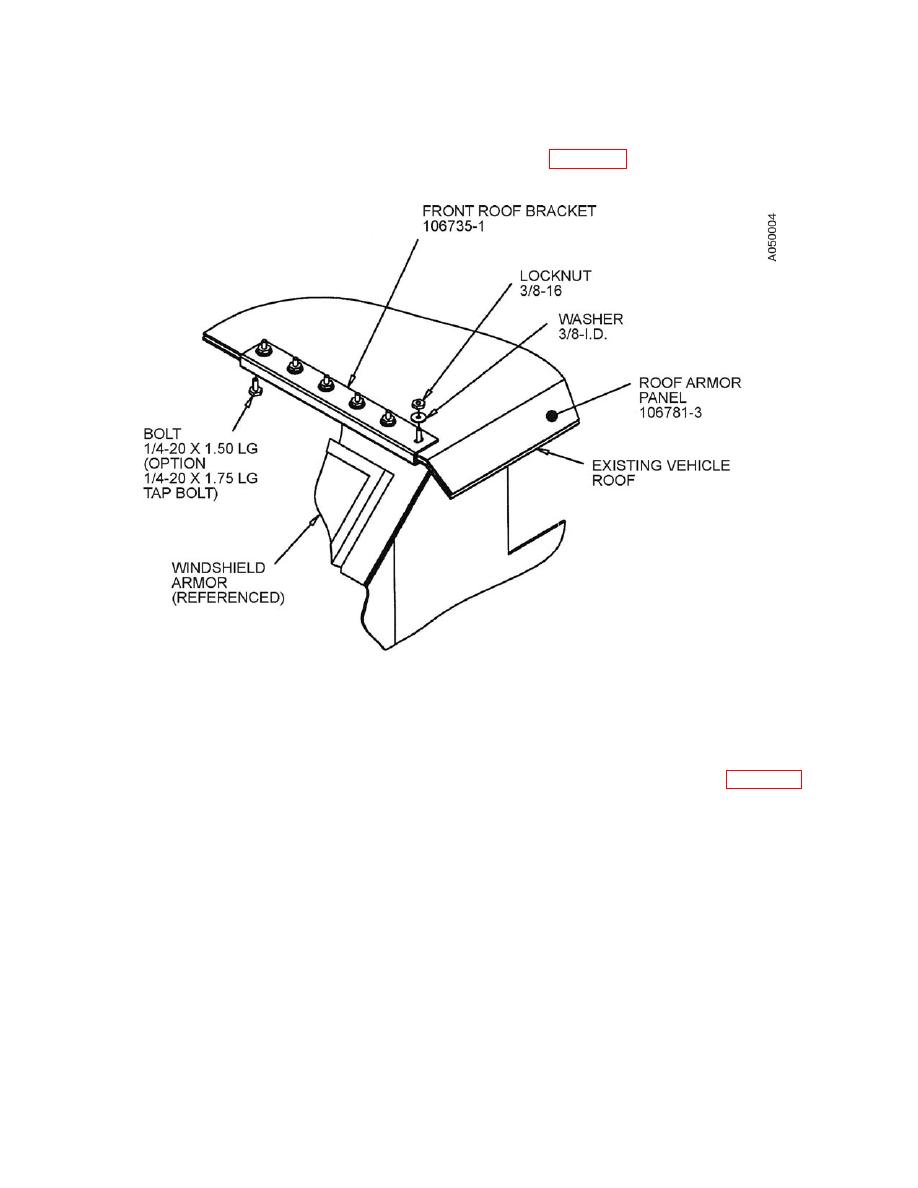
Figure 48. Secure the forward end of the Roof Armor Panel using the attachment hardware. |
|
||
| ||||||||||
|
|
 II106700-5
Rev. B
Page 76
w. Install the driver's-side Roof Panel Front Bracket (P/N 106735-1) over the exposed
studs of the Front Studplate (P/N 106780-1) (See Figure 48).
the attachment hardware.
x. Attach the driver's-side Roof Panel Front Bracket (P/N 106735-1) to the Studplate
(P/N 106780-1) using six washers (3/8 ID) and six locknuts 3/8 16) (see Figure 48).
Hand-tighten the locknuts.
y. Apply Loctite 242 to five bolts (1/4 20 x 1.500 LG).
z. Install the five prepared bolts (1/4 20 x 1.500 LG) into the bottom of the driver's-side
Roof Panel Front Attachment Bracket (P/N 106735-1) (above the driver's-side
windshield). Torque the bolts to 6 ft-lb.
aa. Torque the six locknuts (3/8 16) on top of the driver's-side Roof Panel Front
Attachment Bracket to 23 ft-lb.
ab. Torque the four rear top locknuts (3/8 16) on top of the Rear Roof Panel Rear
Bracket to 23 ft-lb.
ac. Torque the four locknuts (3/8 16) on the bolts going through the Roof Panel Rear
Bracket to 35 ft-lb.
0039 00-86
|
|
Privacy Statement - Press Release - Copyright Information. - Contact Us |
