TB 9-2320-364-13&P-2
DOOR LATCH AND LOCK PIN REPLACEMENT - CONTINUED
0013 00
REMOVAL
1.
Open door assembly.
2.
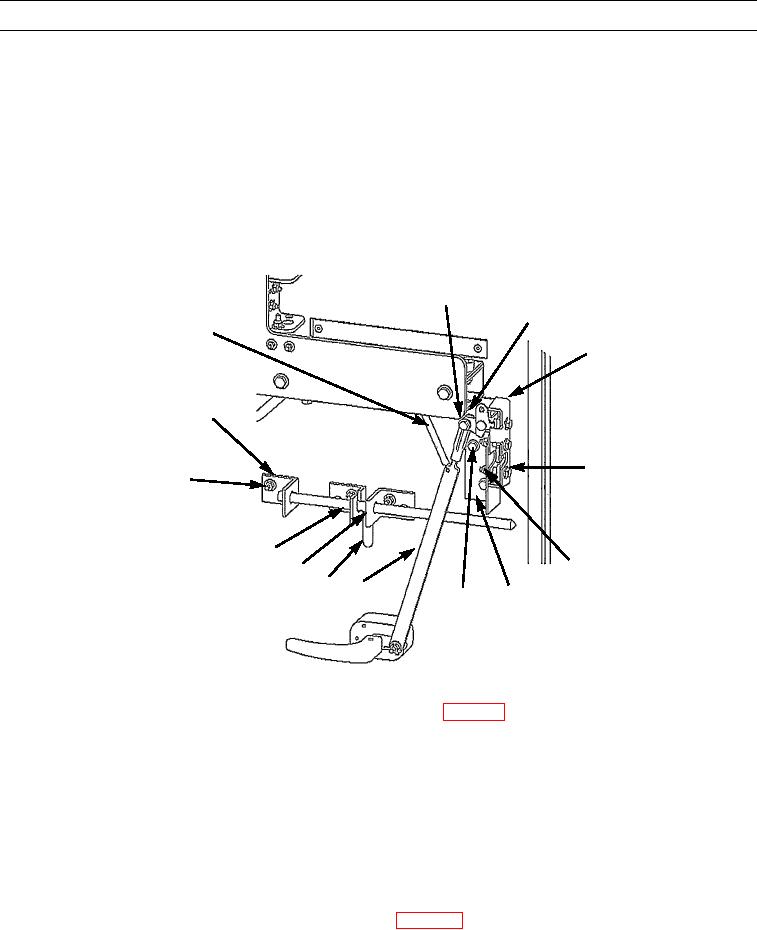
Disconnect spring (1) from link rod (15).
3.
Remove locknut (4), bolt (2), and washer (3) from door latch (5). Discard locknut.
4.
Remove three locknuts (8), washers (9), bolts (6), washers (7), and door latch (5). Discard locknuts.
5.
Remove three locknuts (14), washers (13), bolts (11), washers (12) and latch bracket (10) from door. Discard locknuts.
6.
Remove two locknuts (22), washers (21), bolts (19), washers (20) and bracket (23) from door. Discard locknuts.
7.
Remove lock pin (16) from brackets (17 and 18).
8.
Remove four locknuts (22), washers (21), bolts (19), washers (20) and brackets (17 and 18). Discard locknuts.
2,3
4
1
1
5
23
6,7
19,20
21,22
18
8,9
17
16
15
11,12
10
13,14
417-031
CLEANING AND INSPECTION
Clean and inspect all parts IAW General Maintenance Instructions (WP 0011 00).
INSTALLATION
1.
Install brackets (17 and 18), four washers (20), bolts (19), washers (21), and new locknuts (22) on door.
2.
Install lock pin (16) in brackets (17 and 18).
3.
Install bracket (23), two washers (20), bolts (19), washers (21), and new locknuts (22) on door. Install latch bracket (10),
three washers (12), bolts (11), washers (13), and new locknuts (14) on door.
4.
Install door latch (5) with three washers (7), bolts (6), washers (9), and new locknuts (8).
5.
Position link rod (15) and install washer (3), bolt (2), and new locknut (4) on door latch (5).
6.
Connect spring (1) to link rod (15).
7.
Operate door handle and lock pin to verify correct operation (WP 0004 00).
END OF WORK PACKAGE
0013 00-2

