II113300-1-103
Rev. A
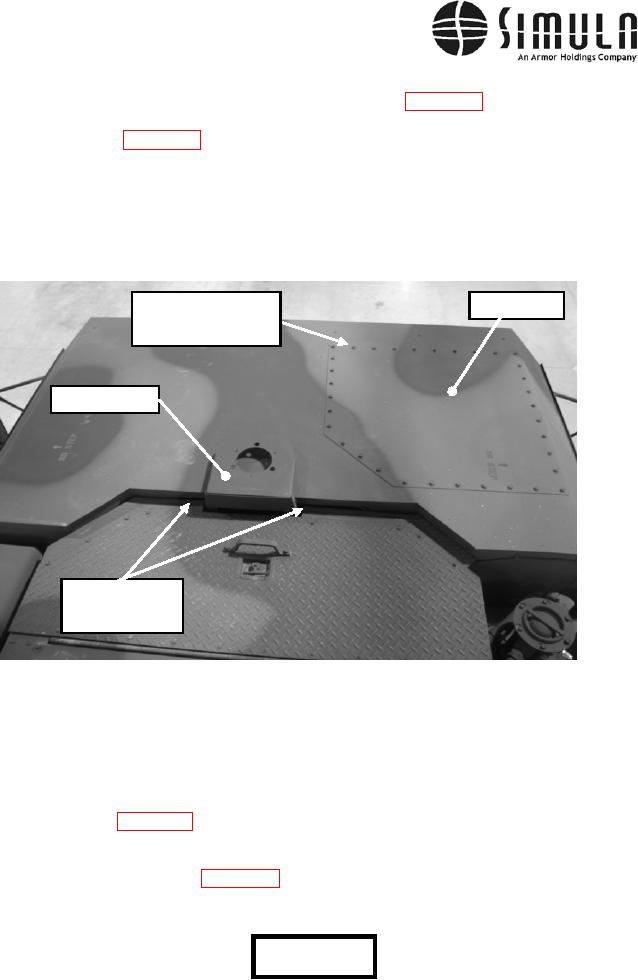
s) Remove the Light Bracket located on top of the Cab (see Figure 11). The Light Bracket
is attached to the back side of the cab with four bolts. Open the access door to reach
their location (see Figure 11). Remove the bolts, and then re-install them once the
bracket has been removed to fill the holes.
t)
Remove the Roof Panel shown in Figure 11. This is done by unscrewing all of the bolts
located around the perimeter of the Panel. The Panel may have some sealant between
its bottom surface and the top of the cab; if so, it may be necessary to pry around the
edge of the Panel to remove it.
Remove bolts all
Roof Panel
around the perimeter
of the Roof Panel
Light Bracket
Remove Bolts
(Open Door to
Access Bolts)
Figure 11. Roof components to be removed.
u) Remove the Electrical Connector and Glad Hands located under the front of the vehicle,
as shown in Figure 12. This is done by removing the bolts and screws that attach these
items to the adjacent vertical plate. Disconnect the airline hoses from the Glad hands.
v) Disconnect the Steering Link form the Power Steering Arm. This is done by removing
the bolt shown in Figure 12 and then pushing the connecting pin out of the hole in the
Arm.
w) Remove the Torque Rod (see Figure 13) by disconnecting two bolts located at both ends
of the Rod.
CAUTION
Do not move the vehicle after the Torque Rod has been removed. Doing
this may make the Torque Rod difficult to re-install.
0037 00-36

