|
| |
TM 9-2320-364-20-4
12-23
(3)
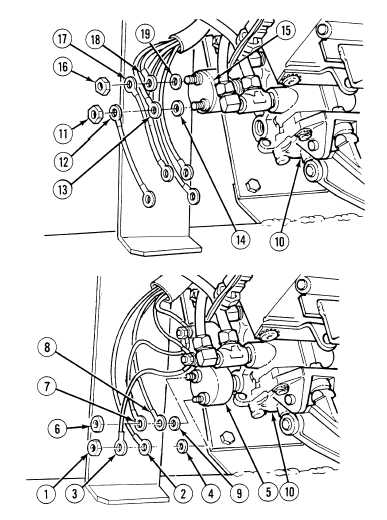
Install washer (19), wire 1009 (18), wire
1009 (17) and nut (16) on terminal of upper
brake switch (15).
(4)
Install washer (14), wire 1005 (13), wire
1005 (12) and nut (11) on terminal of upper
brake switch (15).
Adhesives, solvents, and sealing
compounds can burn easily, can
give off harmful vapors, and are
harmful to skin and clothing. To
avoid injury or death, keep away
from open fire and use in a well-
ventilated area. If adhesive,
solvent, or sealing compound
gets on skin or clothing, wash
immediately with soap and
water.
(5)
Coat threads of lower brake switch (5)
sealing compound.
NOTE
Switch terminals should line up vertically.
(6)
Install lower brake switch (5) on pedal valve (10).
(7)
Install washer (9), wire 1009 (8), wire 1009 (7) and nut (6) on terminal of lower brake switch (5).
(8)
Install washer (4), wire 1005 (3), wire 1005 (2) and nut (1) on terminal of lower brake switch (5).
c.
Follow-On Maintenance:
Connect batteries, (Para 7-87).
Start engine, (TM 9-2320-364-10).
Build up air pressure to 125 psi (861 kPa).
Shut OFF engine, (TM 9-2320-364-10).
Check for leaks, (TM 9-2320-364-10).
Remove wheel chocks, (TM 9-2320-364-10).
END OF TASK
|