 |
|||
|
|
|||
|
Page Title:
12 VOLT AND 24 VOLT TRAILER LIGHT CABLE REPAIR. |
|
||
| ||||||||||
|
|
 TM 9-2330-385-14
This task covers:
a. 12 Volt Cable Repair
b. 24 Volt Cable Repair
c.
Auxiliary Light Bar 24 Volt Cable Repair
INITIAL SETUP
Tools and Special Tools
Materials/Parts - Continued
Tool Kit, General Mechanic's: Automotive
Contact, Electrical (AR) (Item 12, Appendix I)
(Item 50, Appendix J)
Contact, Electrical (AR) (Item 13, Appendix I)
Tool Kit, Electrical (Item 48, Appendix J)
Contact, Electrical (AR) (Item 14, Appendix I)
Gun, Heat (Item 16, Appendix J)
Lockwashers (8), (Item 57, Appendix I)
Pencil, Soldering, Electric (Item 30, Appendix J)
Materials/Parts
Equipment Condition
Heatshrink (AR), (Item 13, Appendix E)
Cable removed from trailer, (TM 9-2320-364-10)
or (Para 4-30)
Tags, Identification (Item 23, Appendix E)
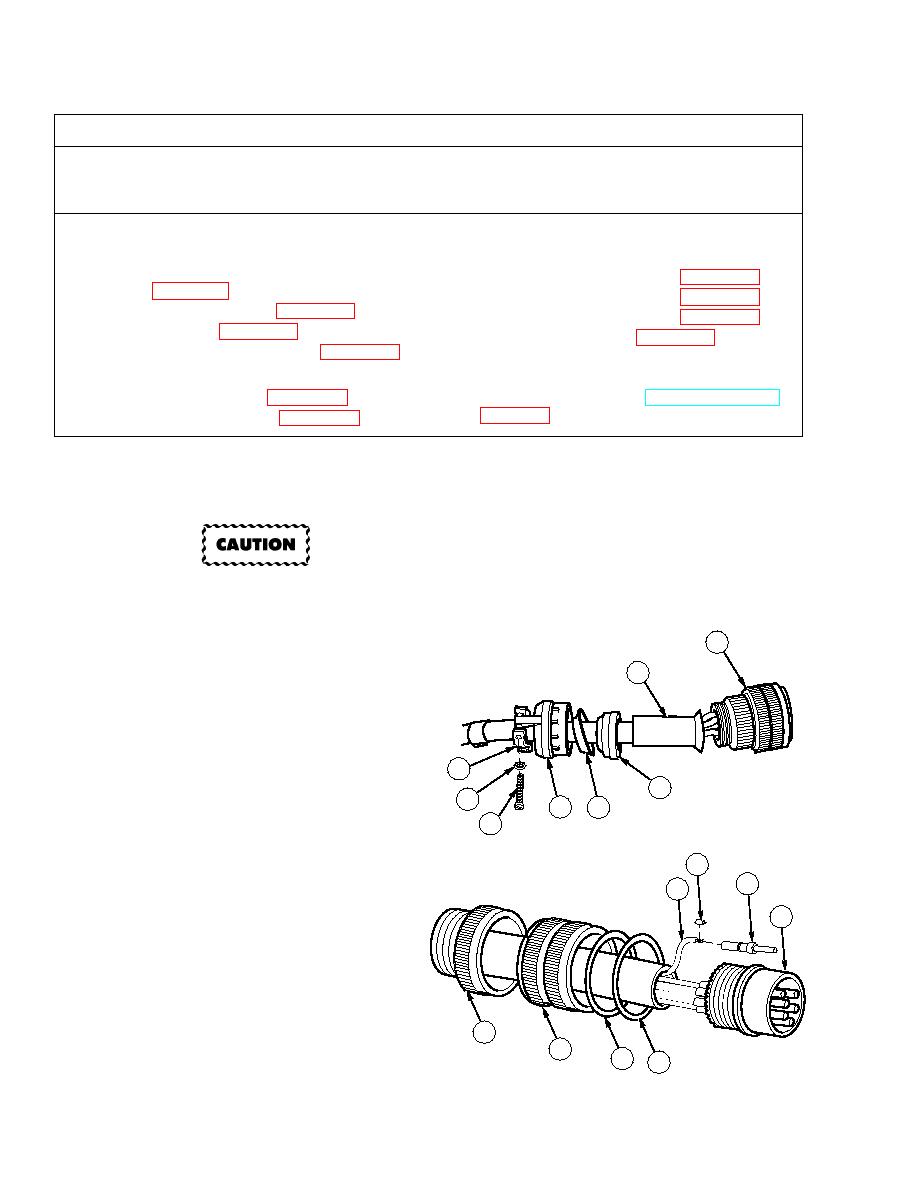
a.
12 Volt Cable Repair.
(1)
Disassembly.
Terminals come in different
styles and sizes. To prevent
damage, ensure to use only the
exact replacement. Do not
8
attempt to modify terminal to fit.
7
NOTE
Repeat procedure as necessary.
(a)
Remove two screws (1), lockwashers (2)
and cable clamps (3) from nut (4).
Discard lockwashers.
3
6
(b)
Remove nut (4), grommet (5), seal (6)
2
4
5
and boot (7) from connector (8).
1
(c)
Remove sleeve (9), collar (10), spring
15
washer (11) and washer (12) from
14
connector (8).
13
NOTE
8
Tag and mark all wires prior to removal.
(d)
Remove wire (13) and terminal (14)
from connector (8).
(e)
Cut off terminal (14) at end of wire (13).
Remove insulation (15) 1/4 inch (.635
9
10
cm) from end of wire (13). Discard
11
12
terminal.
|
|
Privacy Statement - Press Release - Copyright Information. - Contact Us |
