 |
|||
|
|
|||
|
|
|||
| ||||||||||
|
|
 TM 9-2330-385-14
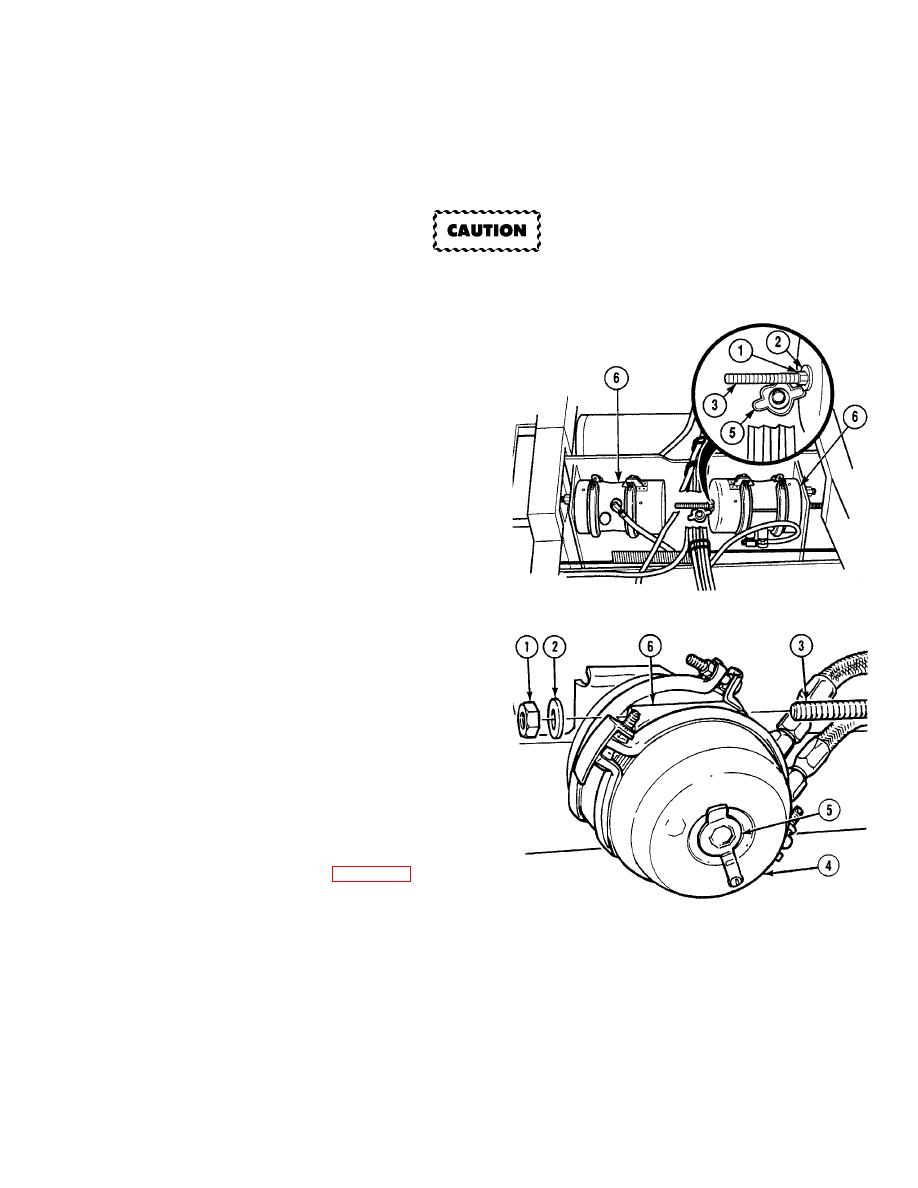
(2)
Remove protective cap (5) on rear portion of flatrack lock air chambers (6).
(3)
Insert T-end of caging bolt (3) into hole on rear of flatrack lock air chamber (6).
(4)
Rotate caging bolt (3) counterclockwise 1/4 turn until it stops.
Tighten only until spring is fully compressed. Do not tighten over 50 lb-ft (67.8 N..m) or
damage may occur to air chamber.
NOTE
If caging bolt cannot be
pulled directly out it is
properly inserted.
Spring is fully compressed
when caging bolt is sticking
out approximately three in.
(7.62 cm).
(5)
Install nut (1) and washer (2) on caging
bolt (3). Tighten until spring is fully
compressed.
(6)
Repeat Steps (1) through (5) for the other
flatrack air chamber.
b.
Uncage.
(1)
Remove nuts (1), washers (2) and remove
caging bolts (3) from brake chambers (4).
(2)
Install protective caps (5) on rear of flatrack
air chambers (6).
(3)
Install caging bolts (3) in storage position on
brake chambers (4), with washers (2) and
nuts (1).
c.
Follow-On Maintenance:
Remove wheel chocks, (Para 2-20).
END OF TASK
4-547
|
|
Privacy Statement - Press Release - Copyright Information. - Contact Us |
