 |
|||
|
|
|||
|
|
|||
| ||||||||||
|
|
 TM 9-2330-385-14
This task covers:
a. Removal
c. Installation
b. Cleaning/Inspection
d. Follow-On Maintenance
INITIAL SETUP
Tools and Special Tools
Equipment Condition
Tool Kit, General Mechanic's: Automotive
Wheels chocked, (Para 2-20)
(Item 50, Appendix J)
Flatrack removed, (TM 9-2320-364-10)
Rod, Unlocking (Item 8, Appendix C)
Air system drained, (Para 2-21)
Flatrack lock chamber caged, (Para 4-65)
Material/Parts
Compound, Anti-Seize (Item 5, Appendix E)
Bushing (2) (Item 2, Appendix I)
Pin, Cotter (2) (Item 66, Appendix I)
Pin, Cotter (Item 68, Appendix I)
a.
Removal.
Use care when removing springs.
Springs are under tension and can
act as projectiles when released.
Injury to personnel may result.
NOTE
Both flatrack locks are removed
the same way. Right side shown.
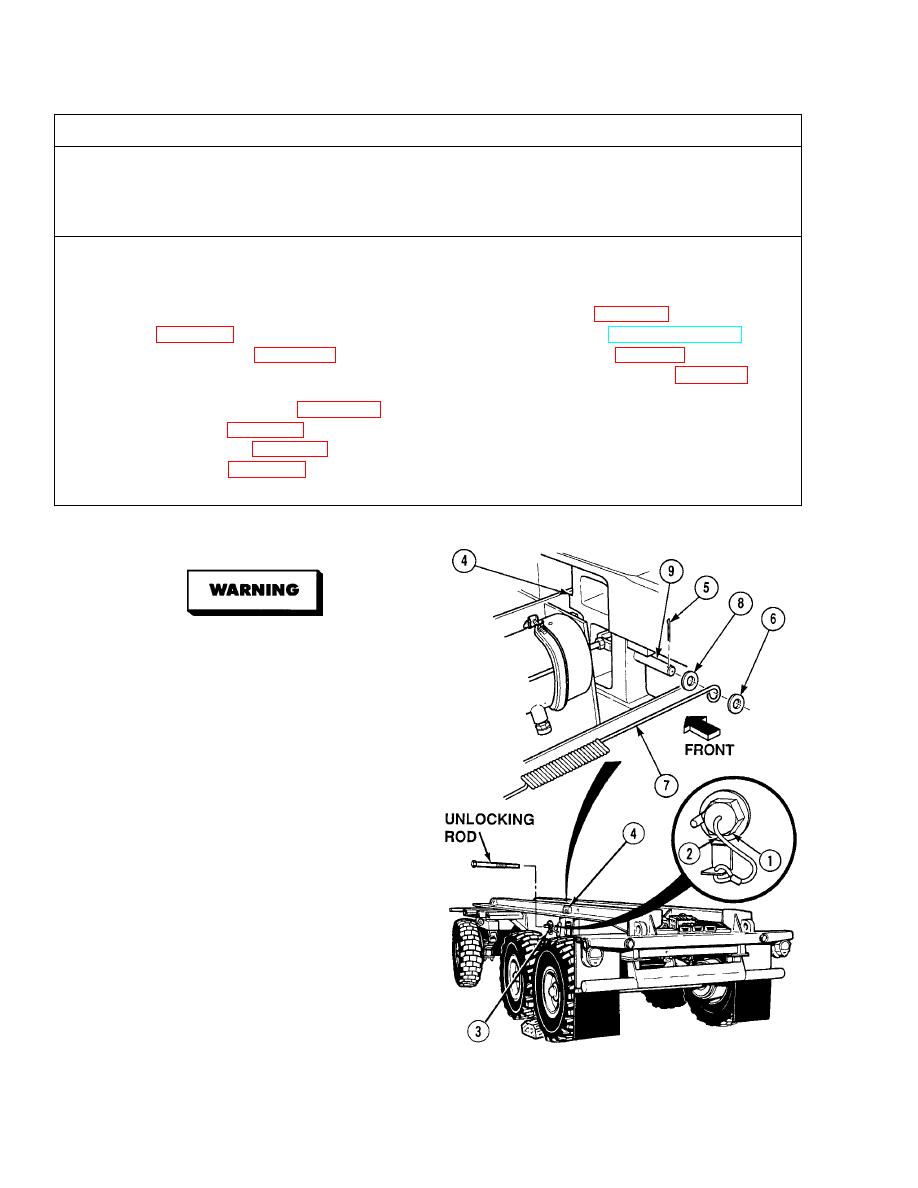
(1)
Remove cap (1) on cable (2) from threaded
frame hole (3).
(2)
Install unlocking rod into opposite threaded
frame hole (3) of flatrack load lock (4).
(3)
Turn unlocking rod clockwise until flatrack
load lock (4) is retracted.
(4)
Remove cotter pin (5), washer (6), coil
spring (7) and washer (8) from upper locking
pin (9). Discard cotter pin.
|
|
Privacy Statement - Press Release - Copyright Information. - Contact Us |