|
| |
TM 9-2320-364-20-5
20-20
20-5. FAN CONTROL SOLENOID VALVE REPAIR (CONT).
NOTE
Wire and seal should be
positioned so larger wings of
terminal will crimp around dust
boot and smaller wings will crimp
around exposed bare wire.
(8)
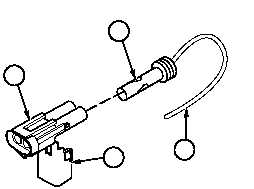
Position wire (15) on terminal (17).
(9)
Press handles of weatherpac crimper
together until ratchet releases and crimp is
complete.
(10)
Repeat Steps (6) through (9) for remaining
wire.
(11)
Position two terminals (17) and wires (15)
through connector (1) until seated.
(12)
Close two secondary locks (19) on
connector (1).
(13)
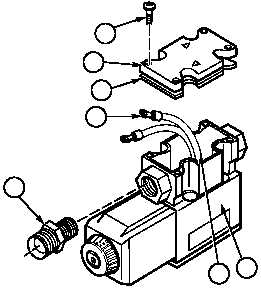
Remove four screws (20), cover (21) and
gasket (22) from fan control solenoid valve
(2). Discard gasket.
(14)
Install cord grip (23) on fan control
solenoid valve (2).
(15)
Cut and remove two ring terminals (24)
from fan control solenoid valve wires (25).
Discard ring terminals.
23
24
22
21
20
25
2
17
1
19
15
|