|
| |
TM 9-2320-364-34-2
6-220
6-25. ELECTRONIC CONTROL BOX WIRE HARNESS REPLACEMENT (CONT).
(27)
Position wire 1072 (48) on solenoid (44)
with lockwasher (47) and nut (46). Tighten
nut to 10 to 15 lb-in (1 to 2 N.m).
(28)
Position wire 1075B (45) on solenoid (44)
with lockwasher (42) and nut (41). Tighten
nut to 30 to 35 lb-in (3 to 4 N.m).
(29)
Position wire 1074 (43) on solenoid (44)
with lockwasher (42) and nut (41). Tighten
nut to 30 to 35 lb-in (3 to 4 N.m).
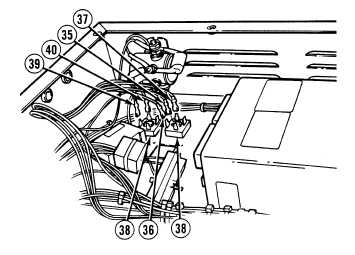
(30)
Install wires 1884 (39) and 1885 (40) on
rectifier (38).
(31)
Install wires 1021 (35), 1538 (36) and 1534
(37) on rectifier (38).
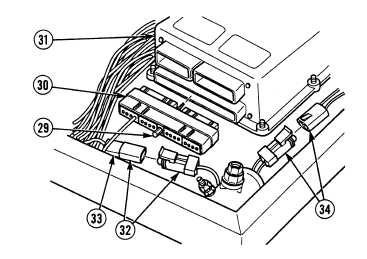
(32)
Connect 908 connector (32) and connect
throttle position control (33) to 908
connector (32).
(33)
Install MC45 connector (30) on ATEC (31)
and secure with screw (29).
NOTE
Perform Step (34) only if MC101
connector was disconnected.
(34)
Connect MC101 connector (34).
|