
TB 9-2320-364-13&P-2
CAB SIDE (FRONT) ARMOR AND SIDE MARKER REPLACEMENT - CONTINUED
0029 00
DISASSEMBLY - CONTINUED
3.
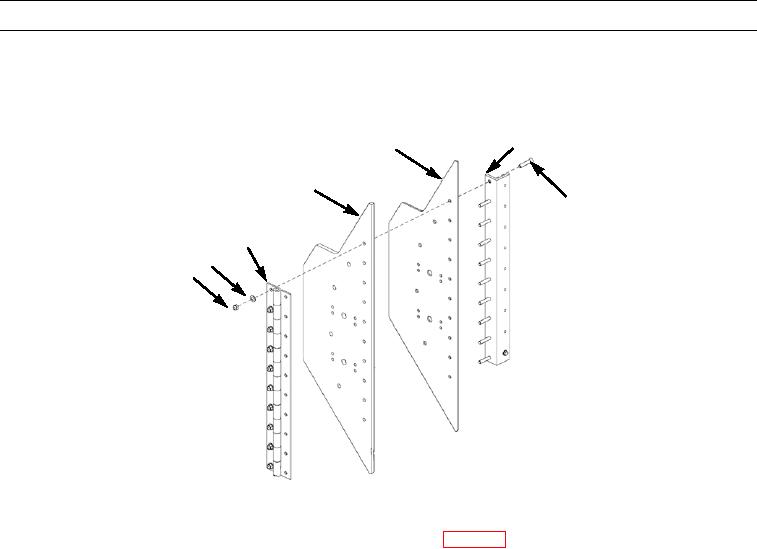
Remove ten locknuts (14), washers (15), and bolts (20) from cab side armor panels (17 and 18). Discard locknuts.
4.
Separate hinge (16), bracket (19), side armor panel (17), and side armor panel (18).
19
18
17
20
16
15
14
417-087
CLEANING AND INSPECTION
Clean and inspect all parts IAW General Maintenance Instructions (WP 0011 00).
ASSEMBLY
N OT E
Ensure cab side armor is assembled in correct order and correct orientation. Thicker armor panel (17) is
installed on the outside of the thinner armor panel (18).
1.
Assemble bracket (19), hinge (16), side armor panel (18), and side armor panel (17).
2.
Install ten bolts (20), washers (15), and new locknuts (14).
N OT E
Lower marker light shown. Upper marker light is identical.
3.
Install side marker gasket (8), side marker (9), four bolts (5), washers (10), and new locknuts (11).
4.
Install side marker cover (12) and two screws (13) on side marker (9).
0029 00-3
Change 1