
TM 5-3990-263-13&P
FIELD MAINTENANCE
TOOLBOX ASSEMBLY REPAIR
INITIAL SETUP:
Materials/Parts (cont.)
Tools and Special Tools
Tool Kit, General Mechanics: Automotive
Lockwasher (WP 0082, Table 1, Item 43) Qty:
8
(WP 0078, Table 2, Item 2)
Locknut (WP 0082, Table 1, Item 24) Qty: 4
Materials/Parts
References
Lockwasher (WP 0082, Table 1, Item 50) Qty: 12
Parts Manual (WP 0073, Figure 2)
REMOVAL
1.
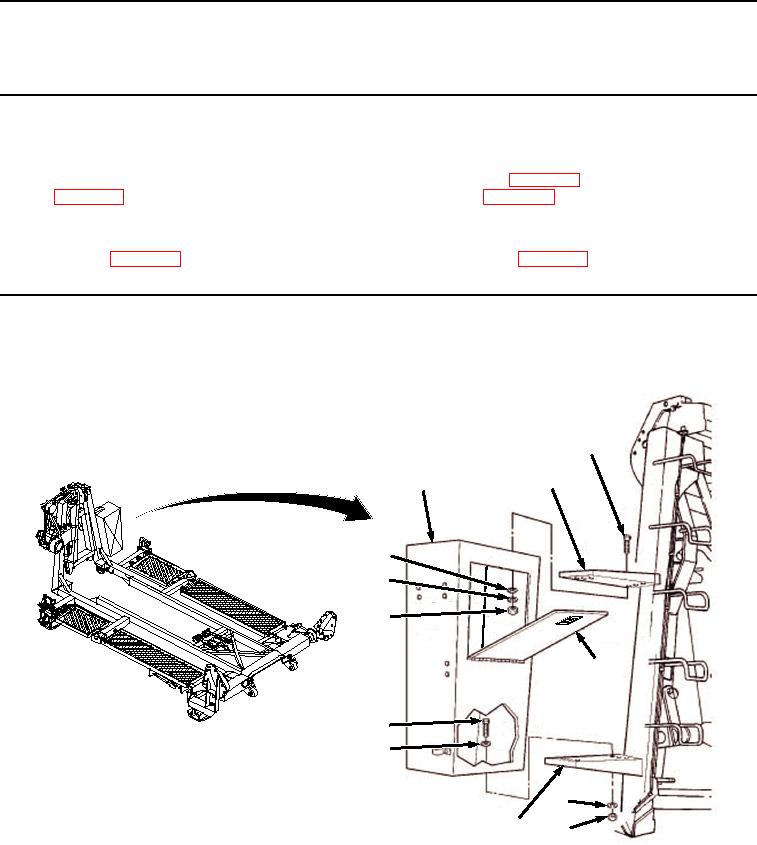
Open toolbox door (Figure 1, Item 1).
2
7
6
3
4
5
1
8
9
10
11
7
Figure 1. Toolbox Assembly Removal.
2.
Remove six bolts (Figure 1, Item 2), washers (Figure 1, Item 3), lockwashers (Figure 1, Item 4), and nuts
(Figure 1, Item 5) from toolbox (Figure 1, Item 6) and frame (Figure 1, Item 7). Discard lockwashers.
3.
Remove six bolts (Figure 1, Item 8), washers (Figure 1, Item 9), lockwashers (Figure 1, Item 10), and nuts
(Figure 1, Item 11) from toolbox (Figure 1, Item 6) and frame (Figure 1, Item 7). Discard lockwashers.
03/15/2011Rel(1.8)root(maintwp)wpno(M04038)