
TM 5-3990-263-13&P
0064
REMOVAL - Continued
41
42
34 43
39
40
44
44
45
45
46
46
47
48
48
49
50
60
61
58
55
53
54
52
51
39
38
62
69
67
64
61
63
57
54
68
70
56
64
59
66
65
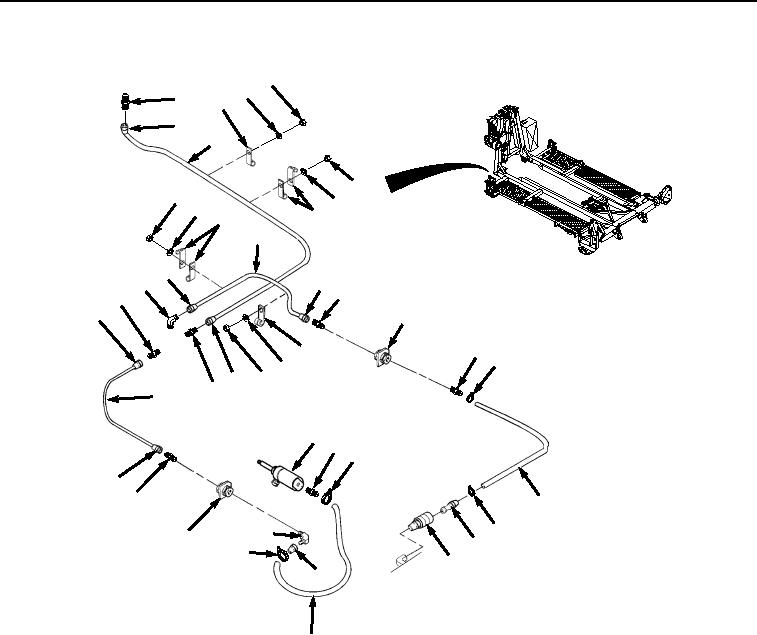
Figure 2.
Tube Nuts Removal.
17.
Remove three nuts (Figure 2, Item 41), lockwashers (Figure 2, Item 42), and loop clamps (Figure 2, Item 43)
from tubing (Figure 2, Item 40). Discard lockwashers.
18.
Remove two nuts (Figure 2, Item 44), lockwashers (Figure 2, Item 45), and four loop clamps (Figure 2, Item
46) from two tubings (Figure 2, Items 40 and 47). Remove tubing (Figure 2, Item 40) from BAP frame. Discard
lockwashers.
19.
Remove tube nut (Figure 2, Item 48) from elbow (Figure 2, Item 49) on one end of tubing (Figure 2, Item 47).
Loosen tube nut (Figure 2, Item 48) on other end of tubing (Figure 2, Item 47), and disconnect tubing (Figure
2, Item 47) from adapter (Figure 2, Item 50).
20.
Remove nut (Figure 2, Item 51), lockwasher (Figure 2, Item 52), and loop clamp (Figure 2, Item 53) from tubing
(Figure 2, Item 47) under BAP frame. Remove tubing (Figure 2, Item 47) from BAP frame. Discard lockwasher.
21.
Remove two hose clamps (Figure 2, Item 54), straight adapter (Figure 2, Item 55), and coupling half (Figure
2, Item 56) from air hose (Figure 2, Item 57).
22.
Remove adapter (Figure 2, Item 50), straight adapter (Figure 2, Item 55), and coupling (Figure 2, Item 58) from
BAP frame.
03/15/2011Rel(1.8)root(maintwp)wpno(M04058)