
II113300-1-103
Rev. A
l)
Tighten all the fasteners that were previously left loose in Steps (g) through (h).
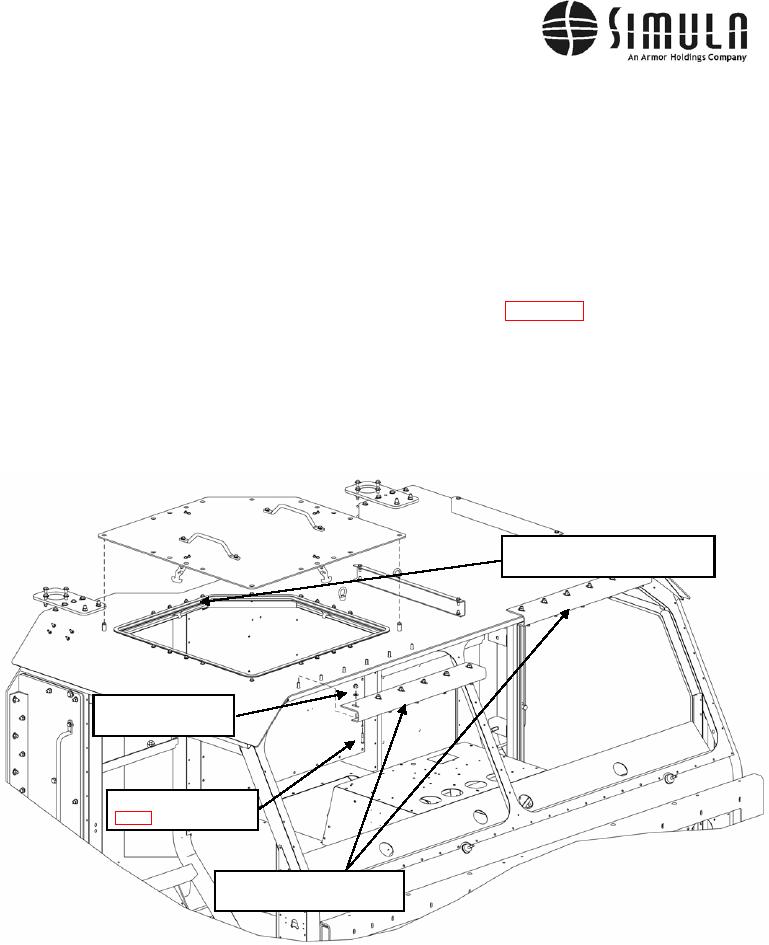
m) Place the Front Roof Panel Brackets (P/N 106735-1-103) over the studs, as shown in
Figure 45. Then, move the bracket as far aft as possible without causing a gap between
the top of the roof and the mating surface of the bracket. Use six (6) 0.375-16 nuts and
washers to fasten the brackets into position. Apply a small amount of Loctite to five (5)
0.250-20 X 1.250-in.-long Hex Head Bolts and install them through the tapped holes
located on the bottom edge of the bracket. Tighten the bolts so that the bracket is
clamped to the cab.
n) Use Urethane Sealant (P/N 104302-1) to fill in the gap between the roof of the cab and
the bottom of roof armor around the Escape Hatch (see Figure 45). From the inside of
the cab and around the Escape Hatch, apply a small amount of Urethane Sealant to the
threaded holes that do not have bolts inserted into them.
o) Place the Escape Hatch Assembly over the opening in the roof and secure it from the
inside of the cab using the four draw latches.
Caulk all around this gap using
Urethane Sealant
Lock Nut 0.375-16,
Washer 0.375 ID
Bolt, Hex Head,
0.250-20 x 1.250 Long
Front Roof Panel Brackets,
P/N 106735-1-103
Figure 45. Escape Hatch and Front Roof Bracket installation.
0037 00-74