TM 5-3990-263-13&P
0052
DISASSEMBLY - Continued
18
19
20
17
21
6
23
22
24
25
13
12
15
1
14
16
26
27
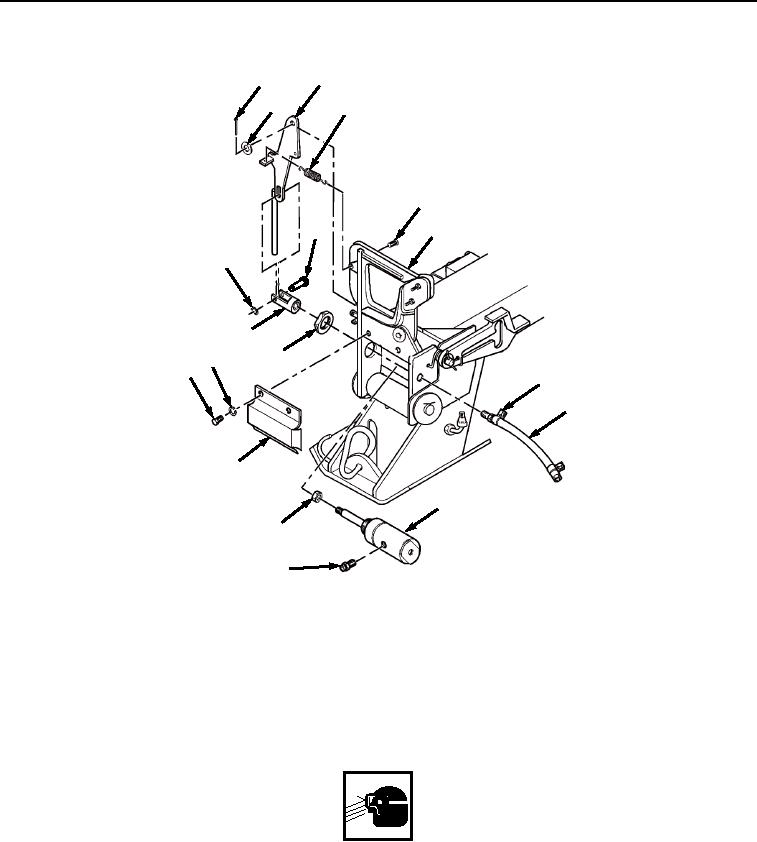
Figure 3. BAP Front Pin Lock Guide Assembly Disassembly.
2.
Loosen clamp (Figure 3, Item 15) on air hose (Figure 3, Item 1) and remove air hose (Figure 3, Item 1) from
air cylinder (Figure 3, Item 16).
3.
Remove two springs (Figure 3, Item 17) from release latch (Figure 3, Item 18) and pin lock guide (Figure 3,
Item 6). Remove cotter pin (Figure 3, Item 19), washer (Figure 3, Item 20), and headed straight pin (Figure 3,
Item 21) from pin lock guide (Figure 3, Item 6). Discard cotter pin.
WARNING
Wear safety goggles and use caution when removing or installing springs, snaprings,
retaining rings, and other parts under spring tension. These parts are under tension and can
act as projectiles when released. Failure to comply may result in serious injury or death to
personnel.
4.
Remove two snaprings (Figure 3, Item 22) and straight pin (Figure 3, Item 23) from clevis (Figure 3, Item 24).
Remove clevis (Figure 3, Item 24) from release latch (Figure 3, Item 18).
5.
Remove release latch (Figure 3, Item 18) from pin lock guide (Figure 3, Item 6).
03/15/2011Rel(1.8)root(maintwp)wpno(M04047)

